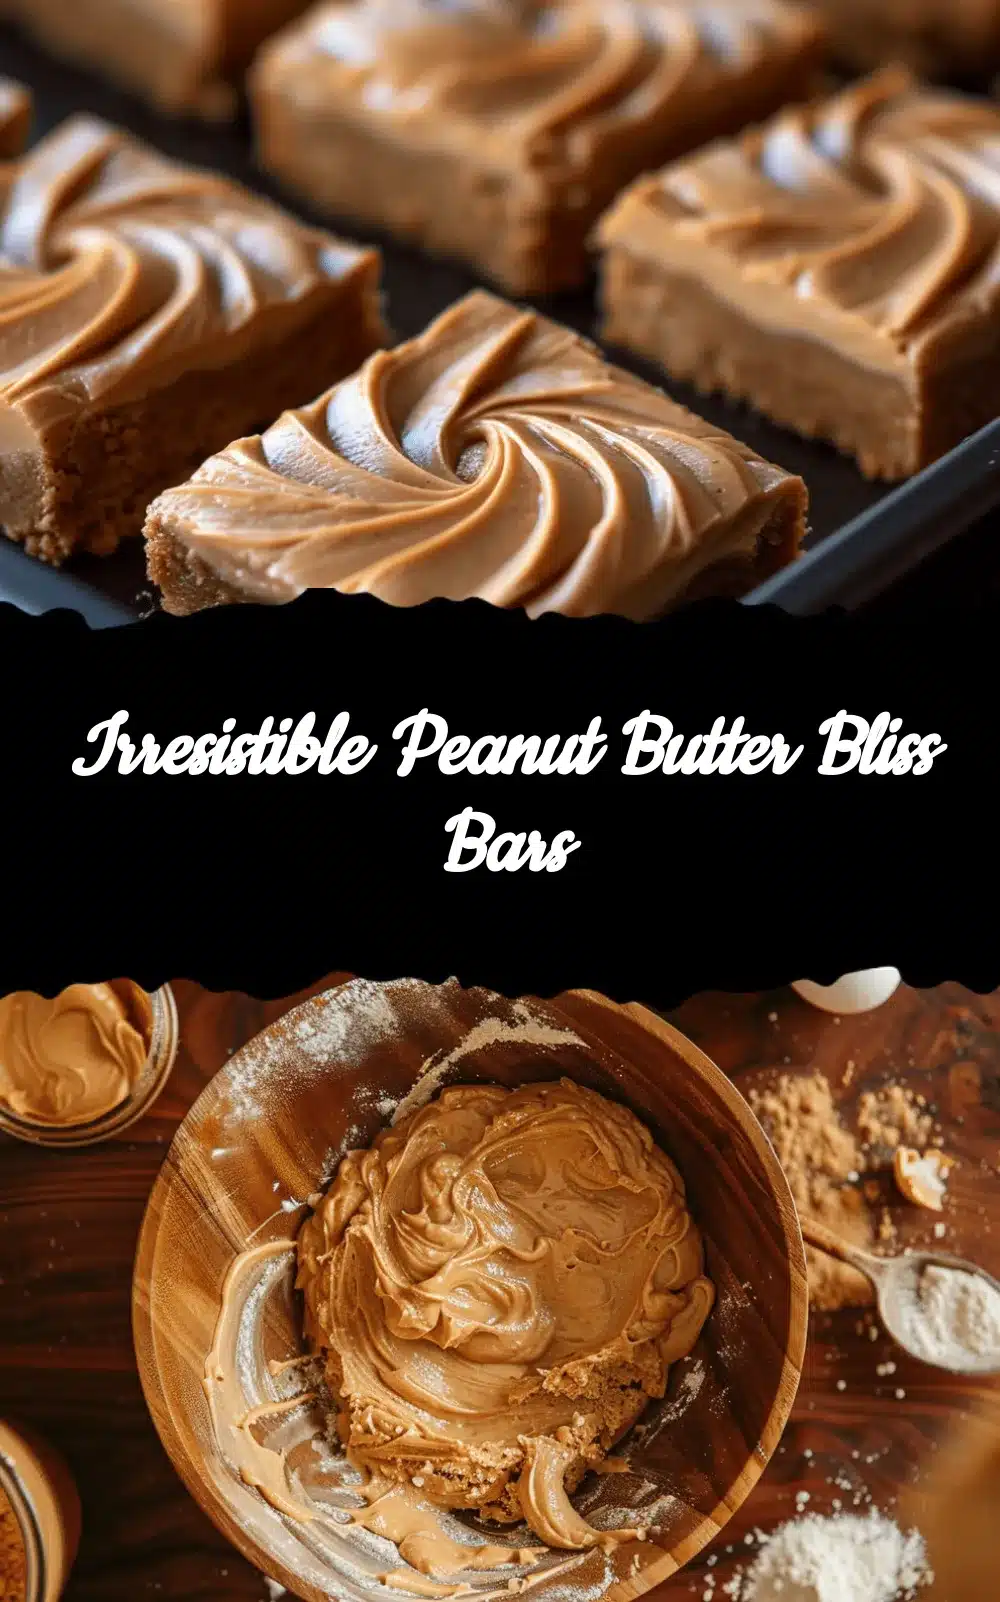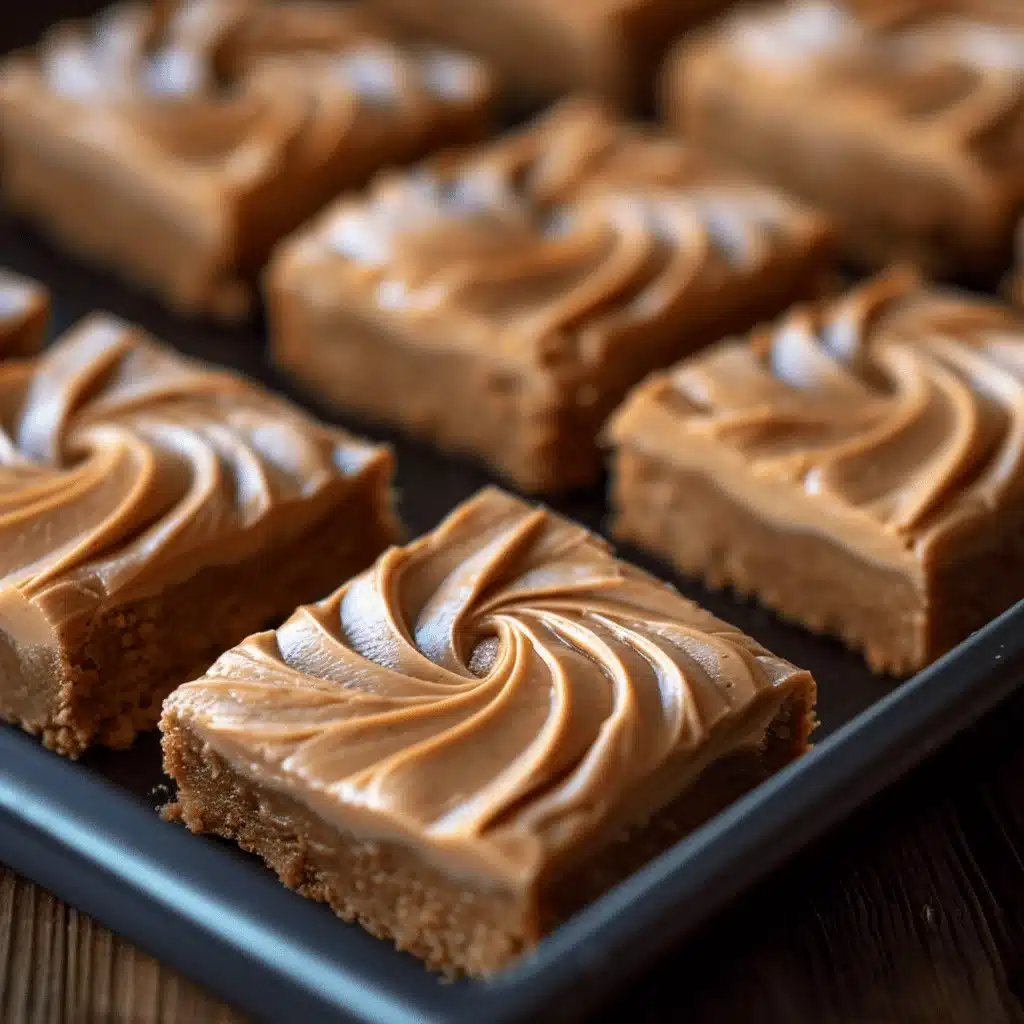
There’s something magical about biting into a Perfect Peanut Butter Lunch Lady Cookie Bar—the nostalgic sweetness, the soft texture, and that unmistakable peanut butter flavor. I first stumbled upon these delightful bars during a school bake sale, and I’ve been hooked ever since. Honestly, they bring back memories of childhood lunches, where everything seemed oh-so-simple.
These cookie bars are a modern twist on a classic school treat, perfect for peanut butter lovers and anyone craving a comfort food fix. The recipe is straightforward, making it ideal for busy parents looking to whip up a quick batch for school events or weekend treats. Plus, who can resist a recipe that’s been tested and loved over the years?
As someone who’s baked these bars on countless occasions, I’ve fine-tuned the recipe to ensure you achieve that perfect balance of flavors every time. Whether you’re a novice baker or a seasoned pro, these bars are sure to be a hit. You’ll love how the peanut butter adds a rich, creamy depth to each bite, making these bars irresistibly delicious.
Print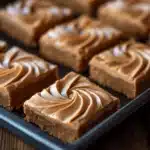
Perfect Peanut Butter Lunch Lady Bars: Easy School Treat
- Total Time: 30-35 minutes
- Yield: 24 bars 1x
Description
These cookie bars are a modern twist on a classic school treat, perfect for peanut butter lovers and anyone craving a comfort food fix. The recipe is straightforward, making it ideal for busy parents looking to whip up a quick batch for school events or weekend treats.
Ingredients
- 1 cup creamy peanut butter
- 1 cup granulated sugar
- 1 cup brown sugar, packed
- 1 cup unsalted butter, softened
- 3 large eggs, room temperature
- 1 teaspoon vanilla extract
- 2 cups all-purpose flour
- 1 teaspoon baking powder
- 1/2 teaspoon salt
- 1/2 cup chopped peanuts (optional)
- 1/2 cup chocolate chips (optional)
Instructions
- Preheat your oven to 350°F (175°C) and prepare your baking pan by greasing it lightly or lining it with parchment paper.
- In a large bowl, beat together the softened butter, granulated sugar, and brown sugar until light and fluffy, about 3-4 minutes.
- Mix in the peanut butter, eggs, and vanilla extract until well combined. The mixture should be smooth and creamy.
- In a separate bowl, whisk together the flour, baking powder, and salt.
- Gradually add the dry ingredients to the wet mixture, stirring until just combined. Don’t overmix.
- Pour the batter into your prepared pan, spreading it evenly with a spatula. If using, sprinkle chopped peanuts or chocolate chips on top.
- Place in the preheated oven and bake for 20-25 minutes, or until the edges are golden brown and a toothpick inserted in the center comes out clean.
- Allow the bars to cool in the pan for about 10 minutes before slicing them into squares. Enjoy!
Notes
Ensure your butter and eggs are at room temperature for smooth mixing. Avoid overmixing to keep the bars tender. Check for doneness using the toothpick test.
- Prep Time: 10 minutes
- Cook Time: 20-25 minutes
- Category: Dessert
- Cuisine: American
Nutrition
- Serving Size: 1 bar
- Calories: 250
- Sugar: 20
- Sodium: 150
- Fat: 14
- Saturated Fat: 6
- Carbohydrates: 28
- Fiber: 1
- Protein: 5
Keywords: Peanut Butter, Cookie Bars, School Treat, Easy Dessert, Comfort Food
Why You’ll Love This Recipe
- Quick & Easy: Ready in just under 30 minutes, these bars are perfect for last-minute treats.
- Simple Ingredients: No need for a special grocery trip; you probably have everything in your pantry.
- Perfect for Any Occasion: Whether it’s a school event, a potluck, or a cozy evening at home, these bars fit right in.
- Crowd-Pleaser: Both kids and adults rave about them, making them a guaranteed hit at any gathering.
- Unbelievably Delicious: The creamy peanut butter and soft cookie texture are pure comfort food heaven.
What’s different about this recipe? It’s all about the balance. By carefully blending the ingredients, you get a bar that’s not too sweet, not too dense, but just right. They’re the kind of treat that makes you close your eyes in bliss after the first bite. Perfect for impressing guests without the stress and turning a simple snack into something memorable.
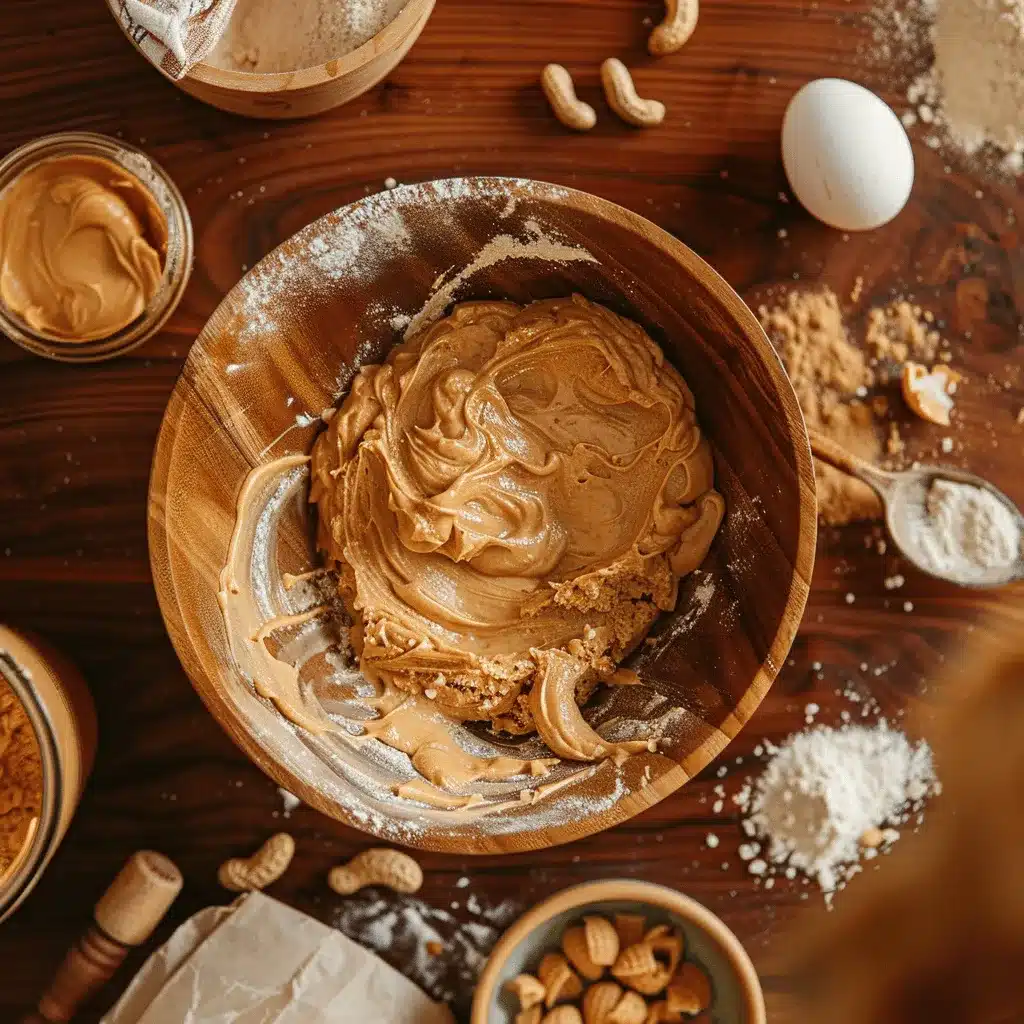
Ingredients Needed
This recipe uses simple, wholesome ingredients to deliver bold flavor and satisfying texture without the fuss. Here’s what you’ll need:
- For the batter:
- 1 cup creamy peanut butter (adds richness)
- 1 cup granulated sugar
- 1 cup brown sugar, packed
- 1 cup unsalted butter, softened
- 3 large eggs, room temperature
- 1 teaspoon vanilla extract
- 2 cups all-purpose flour
- 1 teaspoon baking powder
- 1/2 teaspoon salt
- Optional toppings:
- 1/2 cup chopped peanuts (for extra crunch)
- 1/2 cup chocolate chips (for a chocolatey twist)
I recommend using a firm, creamy peanut butter for best texture. For a gluten-free option, swap in almond flour. If you’re feeling adventurous, try adding a handful of your favorite nuts or chocolate chips.
Equipment Needed
- 9×13 inch baking pan
- Mixing bowls
- Electric mixer or hand whisk
- Spatula
- Parchment paper (optional)
If you don’t have an electric mixer, a sturdy hand whisk will do the trick—just get ready for a little arm workout! A baking pan with a detachable base can make removing the bars easier, but it’s not essential. For easy cleanup, lining your pan with parchment paper is a game-changer.
Preparation Method
- Preheat your oven: Set it to 350°F (175°C) and prepare your baking pan by greasing it lightly or lining it with parchment paper.
- Cream the butter and sugars: In a large bowl, beat together the softened butter, granulated sugar, and brown sugar until light and fluffy. This should take about 3-4 minutes.
- Add the wet ingredients: Mix in the peanut butter, eggs, and vanilla extract until well combined. The mixture should be smooth and creamy.
- Combine dry ingredients: In a separate bowl, whisk together the flour, baking powder, and salt.
- Mix the batter: Gradually add the dry ingredients to the wet mixture, stirring until just combined. Don’t overmix—this keeps the bars tender.
- Spread the batter: Pour the batter into your prepared pan, spreading it evenly with a spatula. If using, sprinkle chopped peanuts or chocolate chips on top.
- Bake: Place in the preheated oven and bake for 20-25 minutes, or until the edges are golden brown and a toothpick inserted in the center comes out clean.
- Cool and serve: Allow the bars to cool in the pan for about 10 minutes before slicing them into squares. Enjoy!
For best results, make sure your butter is truly softened. If your bars seem too dense, try sifting the flour before mixing. Enjoy the delicious aroma of peanut butter wafting through your kitchen—it’s a hint of the tasty treat to come!
Cooking Tips & Techniques
Here are some tips to ensure your peanut butter lunch lady bars come out perfect every time:
- Consistency is key: Ensure your butter and eggs are at room temperature for smooth mixing.
- Avoid overmixing: Once you add the dry ingredients, mix until just combined to keep the bars tender.
- Watch the bake time: Overbaking can lead to dry bars. Check for doneness using the toothpick test.
- Personal Failure: I once forgot the vanilla extract—lesson learned! It adds a subtle depth to the flavor.
- Multitasking: While the bars bake, prep your toppings or clean up the kitchen. It makes the process feel seamless.
Variations & Adaptations
Want to switch things up? Here are some delicious variations:
- Dietary Needs: Use almond flour for a gluten-free version or a vegan butter substitute for dairy-free.
- Seasonal Twist: Add a sprinkle of cinnamon and nutmeg for a warm, fall-inspired flavor.
- Flavor Boost: Stir in 1/2 cup of shredded coconut or dried cranberries for added texture and taste.
- Cooking Method: Try baking in a muffin tin for individual servings—adjust baking time to 15-18 minutes.
- Personal Favorite: I love adding a drizzle of melted dark chocolate on top for a rich, decadent touch.
Serving & Storage Suggestions
These bars are best enjoyed fresh but can be stored for future snacking:
- Serving: Serve at room temperature or slightly warm with a cold glass of milk or a hot cup of coffee.
- Presentation: Cut into even squares and stack them on a colorful plate for an eye-catching display.
- Storage: Store in an airtight container at room temperature for up to 5 days.
- Freezing: Wrap individual bars in plastic wrap and freeze in a zip-top bag for up to 3 months.
- Reheating: Thaw frozen bars at room temperature or warm them in the microwave for a few seconds to enjoy that fresh-baked feel.
Nutritional Information & Benefits
These peanut butter bars are not only tasty but packed with some nutritional benefits too:
- Calories: Approximately 250 calories per serving
- Protein: Peanut butter provides a good dose of protein, making these bars a satisfying snack.
- Dietary Considerations: This recipe is naturally gluten-free when using almond flour.
- Allergens: Contains peanuts and dairy; can be adapted for dietary needs.
- Wellness Perspective: Enjoy these bars as part of a balanced diet—they offer a comforting treat with a hint of nostalgia.
Conclusion
These Perfect Peanut Butter Lunch Lady Cookie Bars are a delightful treat that brings school-day nostalgia to your kitchen. Easy to make and even easier to enjoy, they’re worth trying for both their taste and simplicity. Plus, you can customize them to suit your preferences, whether it’s adding a chocolate drizzle or opting for a gluten-free version.
I love this recipe because it never fails to bring smiles to faces, including mine! So, go ahead and whip up a batch. I’d love to hear how yours turned out—feel free to leave a comment or share your adaptations. Happy baking!
FAQs
Can I use crunchy peanut butter instead of creamy?
Yes, you can! Crunchy peanut butter will add a bit of texture to the bars, which some people enjoy.
How do I make these bars vegan?
To make them vegan, substitute the butter with a plant-based butter and replace the eggs with flax eggs (1 tablespoon ground flaxseed mixed with 3 tablespoons water per egg).
Can these bars be made ahead of time?
Absolutely! You can bake them a day in advance and store them in an airtight container until needed.
What’s the best way to cut these bars?
For clean cuts, let the bars cool completely before slicing. Use a sharp knife and wipe it clean between cuts for neat edges.
Do I need to refrigerate these bars?
No need to refrigerate. Store them at room temperature in an airtight container to keep them fresh.
Pin This Recipe!