Introduction
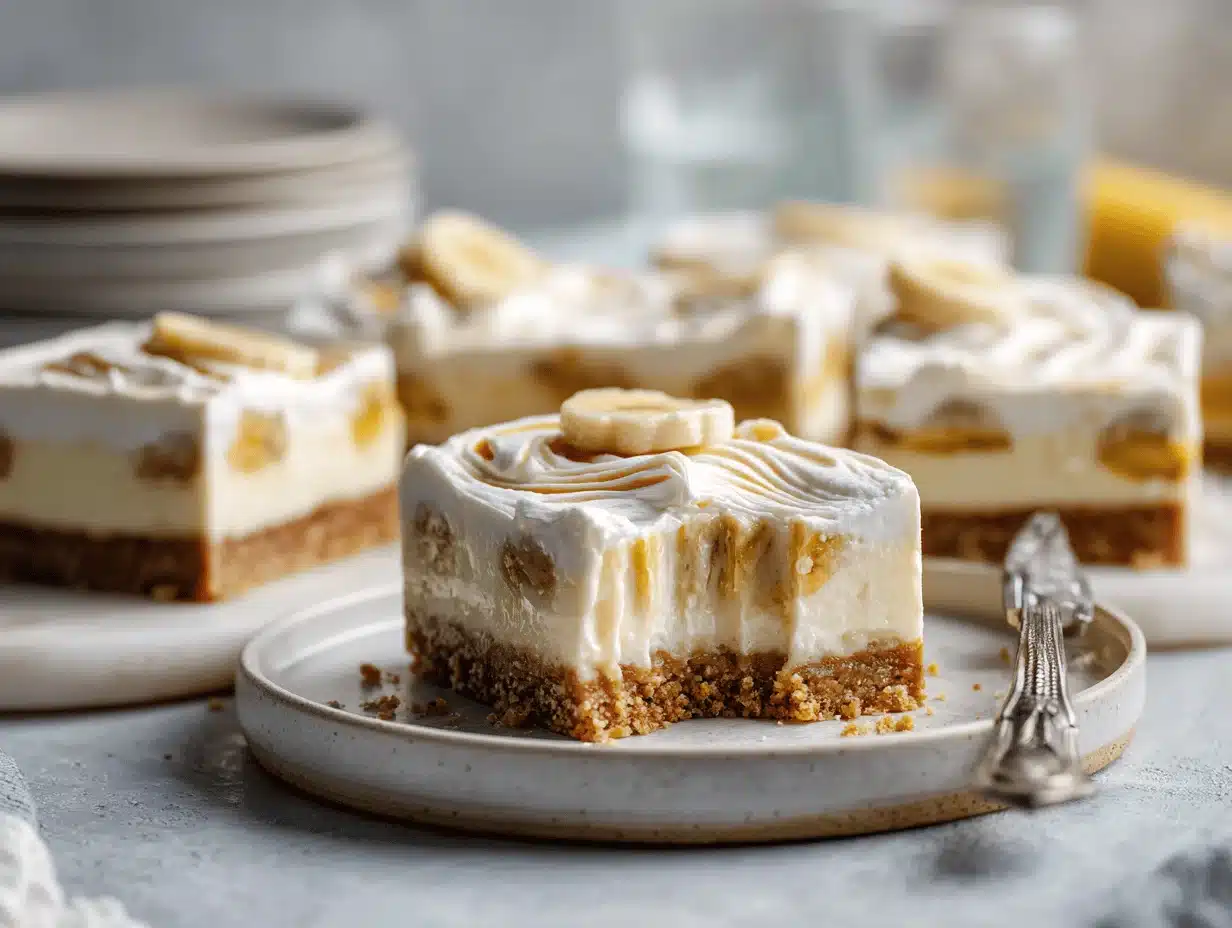
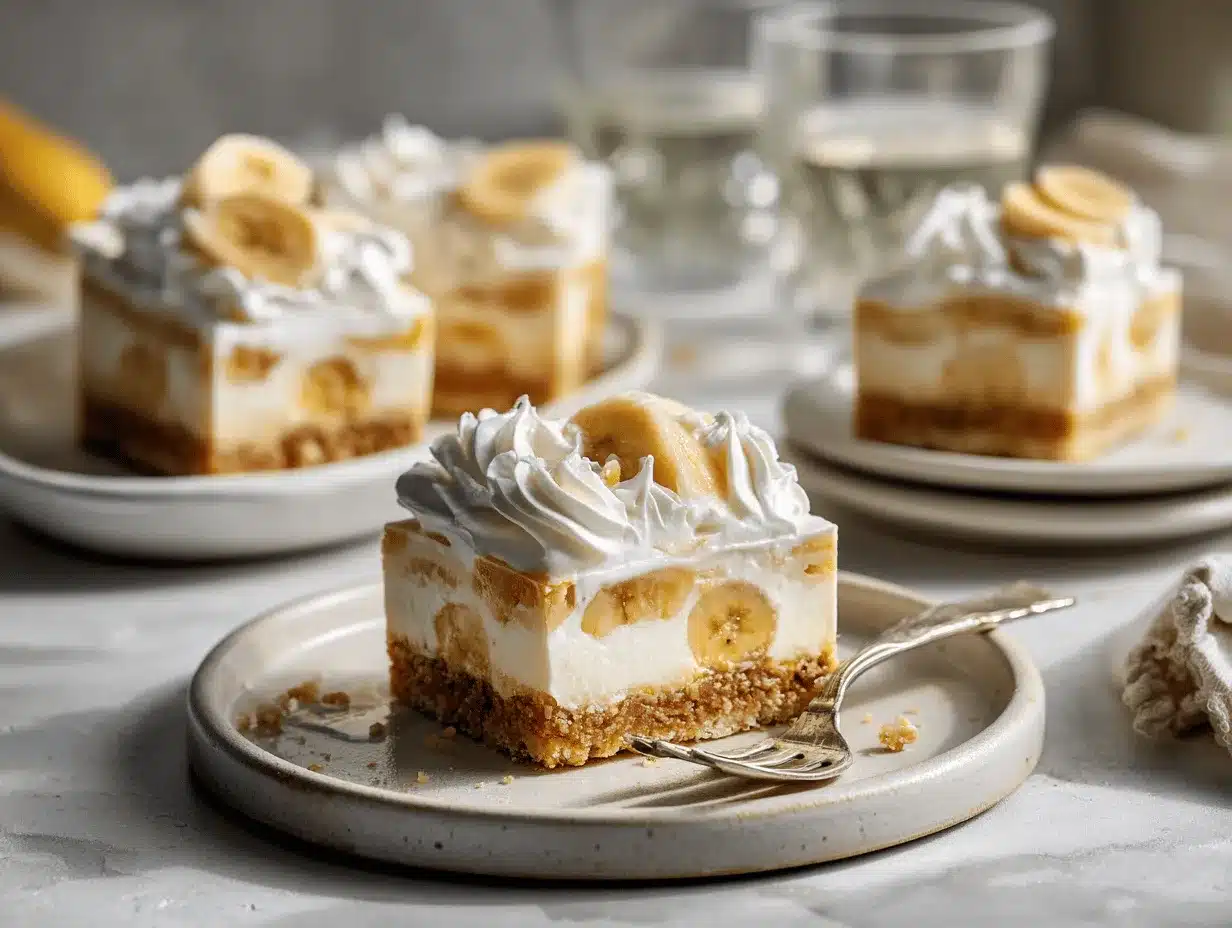
The first time I made no-bake banana cream pie bars, the kitchen smelled like summer memories and cozy family gatherings. Picture this: buttery graham cracker crust, creamy banana pudding, and billowy whipped topping—all layered up without ever turning on the oven. Honestly, these bars are the reason my friends started inviting themselves over on Friday nights. Every bite is a cool, creamy hug, with just the right touch of banana sweetness.
I stumbled into this recipe during one of those “what can I make with what’s left in the pantry?” moments. I was craving something nostalgic—something like grandma’s banana cream pie but, you know, way less work. That’s when these no-bake banana cream pie bars were born. Over the years, I’ve tweaked and tested the layers, and now, they’re my go-to easy dessert for parties, potlucks, or just those nights when you want a treat without fuss.
What’s so special about these bars? They’re a total time-saver, and everyone—from picky kids to dessert-loving adults—can’t get enough. Plus, if you’re like me and avoid complicated baking equipment, this recipe is a dream. As someone who’s made these bars at least a dozen times (and counting), I can say they check every box: flavor, ease, and crowd-pleaser appeal. So if you’re searching for the ultimate no-bake banana cream pie bars recipe, you’re absolutely in the right spot!
Why You’ll Love This Recipe
- Quick & Easy: These bars come together in under 30 minutes (plus chilling time). You don’t need to plan ahead or spend hours in the kitchen—perfect for last-minute party invites or sudden cravings.
- Simple Ingredients: Most of what you need is probably already in your pantry or fridge. No hunting for fancy extracts or specialty flours, just real ingredients you know and love.
- Perfect for Any Occasion: Whether it’s a summer barbecue, birthday party, or just a random Wednesday, these bars fit right in. They’re portable and look impressive enough for a dessert table.
- Crowd-Pleaser: I’ve served these to adults, teens, and toddlers—everyone grabs seconds. The creamy banana filling and crunchy crust win people over every single time.
- Unbelievably Delicious: The contrast between the silky banana cream and that crisp, buttery base is honestly addictive. It’s that close-your-eyes-and-savor kind of good.
What sets this no-bake banana cream pie bars recipe apart is the balance. Some versions get soggy or overly sweet, but not this one—I’ve found the right amount of crust to filling, and let’s be real, the homemade whipped topping takes it up a notch. I use a trick I learned from my mom: a little pinch of salt in the crust brings out all the flavors. And if you want to go wild, you can even add a sprinkle of toasted coconut or chocolate shavings on top (trust me, it’s a game-changer).
For me, these bars aren’t just another dessert—they’re a shortcut to comfort. They’re the kind of treat that makes a regular night feel special, without stressing you out. If you love a dessert that’s as fun to make as it is to eat, these banana cream pie bars should be your next kitchen adventure!
What Ingredients You Will Need
This recipe uses simple, wholesome ingredients to deliver that old-school banana cream pie flavor—minus the oven. Everything is easy to find and, honestly, you probably already have most of it. Here’s what you need to whip up these no-bake banana cream pie bars:
- For the Graham Cracker Crust:
- Graham cracker crumbs (2 cups / 200g; about 14 crackers, crushed very fine)
- Unsalted butter, melted (1/2 cup / 115g; gives the crust its classic richness)
- Granulated sugar (1/4 cup / 50g; balances the slight bitterness of graham crackers)
- Pinch salt (just a tiny bit, trust me—it makes the crust pop!)
- For the Banana Cream Filling:
- Instant vanilla pudding mix (2 packages, 3.4 oz / 96g each; I like Jell-O brand for consistency)
- Whole milk (2 1/2 cups / 600ml; makes the filling super creamy—use 2% if you’re in a pinch)
- Ripe bananas (2 large, sliced; go for bananas with lots of brown spots for the sweetest flavor)
- Cream cheese, softened (8 oz / 225g; adds body and a rich, tangy note)
- Powdered sugar (1/2 cup / 60g; helps blend the cream cheese smooth)
- Pure vanilla extract (1 tsp / 5ml; enhances the banana and pudding flavors)
- For the Whipped Topping:
- Heavy whipping cream (1 cup / 240ml; for best results, chill the bowl and beaters first)
- Powdered sugar (3 tbsp / 23g; just enough to sweeten but not overwhelm)
- Vanilla extract (1/2 tsp / 2.5ml)
- Optional Garnishes:
- Extra banana slices (for topping; slice just before serving to avoid browning)
- Mini vanilla wafers or graham cracker pieces (adds crunch and looks cute!)
- Toasted coconut flakes or chocolate shavings (totally optional but so good)
If you need to make this gluten-free, swap in gluten-free graham crackers. For dairy-free, use plant-based butter and your favorite non-dairy pudding and cream cheese alternatives (just watch the texture). You can also use coconut milk for a tropical twist! Honestly, this recipe is so forgiving—you can tweak it based on what you have, and it’ll still turn out delicious.
Equipment Needed
- 8×8-inch (20x20cm) square baking pan (glass or metal, either works—just line with parchment for easy removal)
- Mixing bowls (you’ll want a medium and a large one)
- Hand mixer or stand mixer (makes whipping cream and blending filling a breeze, but you can use a sturdy whisk with elbow grease)
- Measuring cups and spoons (accuracy matters with the crust and filling!)
- Rubber spatula (for smooth spreading and scraping every last bit out of your bowls)
- Sharp knife (for slicing bananas and cleanly cutting bars)
- Plastic wrap or foil (for chilling and storing the bars)
If you don’t have a square pan, a round cake pan works—just know your bars will be wedges instead of squares (still tasty!). I’ve made these in a disposable foil pan for easy transport to parties, too. When it comes to mixers, I’ve used a $10 hand mixer and an old-school whisk—both get the job done. Just remember to chill your bowl and beaters before making whipped cream for the fluffiest topping! If you’re tight on budget, thrift stores often have great pans and whisks for a few bucks. Wash everything well, especially if you’re using a stand mixer for both crust and cream (no one wants a buttery whipped topping, trust me).
Preparation Method
-
Prepare the Crust (5 minutes):
In a medium bowl, combine 2 cups (200g) graham cracker crumbs, 1/4 cup (50g) sugar, and a pinch of salt. Pour in 1/2 cup (115g) melted unsalted butter and stir until the mixture looks like wet sand—if you squeeze it, it should hold together. Press firmly into the bottom of your lined 8×8-inch (20x20cm) pan. Use the bottom of a measuring cup to get it packed tight. Chill in the fridge while you make the filling. -
Mix the Pudding (5 minutes):
In a large bowl, whisk together 2 packages (3.4oz / 96g each) instant vanilla pudding with 2 1/2 cups (600ml) cold milk. Whisk for about 2 minutes, until it thickens. Let it sit for 3-5 minutes to set up. If it looks lumpy, just keep whisking—it’ll smooth out. -
Blend the Cream Cheese (3 minutes):
In another bowl, beat 8oz (225g) softened cream cheese with 1/2 cup (60g) powdered sugar and 1 tsp (5ml) vanilla extract. Mix until smooth and fluffy, scraping down the sides as needed. If your cream cheese is cold, zap it in the microwave for 10 seconds. -
Combine Filling Layers (3 minutes):
Fold the cream cheese mixture into the pudding until fully combined. The filling should be thick and creamy—if it’s too stiff, add a splash of milk. Gently fold in sliced bananas so they’re evenly distributed but not mashed. -
Assemble the Bars (2 minutes):
Spread the banana cream filling over your chilled crust. Smooth the top with a spatula, making sure it’s level. If you want to get fancy, alternate layers of banana slices and cream filling for a pretty look when sliced. -
Make the Whipped Topping (5 minutes):
With a clean bowl and beaters, whip 1 cup (240ml) heavy cream with 3 tbsp (23g) powdered sugar and 1/2 tsp (2.5ml) vanilla until stiff peaks form—about 2-3 minutes with a mixer, or 5 with a whisk. Don’t overmix, or it’ll turn buttery! -
Top and Chill (5 minutes prep, 2-4 hours chill):
Spread whipped cream over the filling, swirling with your spatula for peaks and valleys. Cover tightly with plastic wrap and chill at least 2 hours (4 is best) for everything to set. This waiting part is tough, but it’s worth it! -
Slice and Serve (2 minutes):
Just before serving, add extra banana slices, vanilla wafers, or chocolate shavings if you like. Run a sharp knife under hot water, wipe dry, and slice the bars for neat edges. Serve cold for the dreamiest texture.
Troubleshooting tip: If your crust crumbles, it probably needs more butter or firmer packing. If your filling is runny, double-check your pudding mix—instant is key, and don’t use hot milk!
I’ve found that prepping the crust and filling while the whipped cream chills saves time. If you’re making these ahead, wait to add the fresh banana garnish until just before serving to keep things looking fresh.
Cooking Tips & Techniques
Over the years, I’ve learned a few tricks to make no-bake banana cream pie bars turn out perfect every time. Here’s what makes the difference:
- Crust Packing: Use the bottom of a measuring cup to really press the graham cracker crust down. If it’s too loose, the bars won’t hold together—especially when you slice them for a party tray.
- Banana Slices: Slice bananas just before folding them into the filling, and keep them thick (about 1/4 inch / 0.5cm). Thin slices can get mushy and disappear in the cream!
- Whipped Cream: Always chill your bowl and beaters before whipping the cream. Warm equipment can make the cream droop and lose its fluff. If you accidentally over-whip, add a splash of cold cream and gently mix to smooth it out.
- Chilling Time: Don’t skimp on the chill! Two hours is the minimum, but four hours ensures neat slices and a firm set. I once served these after just an hour and, let’s just say, it was more like banana cream “scoop.”
- Troubleshooting: If your pudding filling is too thick, whisk in a tablespoon of milk at a time until it loosens up. If it’s too thin, let it chill a bit longer or add a spoonful of instant pudding powder.
- Efficiency: While the crust chills, whisk up your pudding and slice your bananas. No wasted time!
One time I used overripe bananas and the flavor was amazing, but they got a bit too soft in the filling. Aim for ripe but not mushy bananas for the best bite. If your kitchen is hot, stick the pan in the freezer for 10 minutes before slicing—clean cuts, every time.
Variations & Adaptations
One of the best parts about no-bake banana cream pie bars is how easy they are to customize. Here are a few tried-and-true variations you might love:
- Gluten-Free: Use gluten-free graham crackers for the crust. The rest of the recipe is naturally gluten-free, so it’s a simple swap.
- Dairy-Free: Replace butter with vegan butter in the crust, use dairy-free pudding and cream cheese, and swap heavy cream for coconut cream (whipped). I’ve made a batch with oat milk pudding and coconut whipped topping—super creamy and delicious!
- Chocolate Lover’s Twist: Stir 1 tablespoon of cocoa powder into the graham cracker crust and top the bars with mini chocolate chips or chocolate shavings. Chocolate and banana is a match made in dessert heaven.
- Seasonal Fruit: Sub in fresh strawberries or blueberries for a mixed berry cream pie bar. In summer, I’ll add thinly sliced peaches along with bananas for a Southern spin.
- Nutty Crunch: Sprinkle finely chopped toasted pecans or walnuts over the whipped topping for an extra crunch (great if you’re serving adults who love some texture).
- Low-Sugar Version: Use sugar-free pudding mix, reduce the sugar in the crust, and sweeten the whipped cream with a bit of stevia or monk fruit.
One time, I even added a layer of salted caramel sauce between the crust and filling. It was over the top, but oh-so-worth it for a special celebration. If you have nut allergies in the family, skip the nutty toppings. These bars are endlessly adaptable, so make them your own!
Serving & Storage Suggestions
For the best flavor and texture, serve these no-bake banana cream pie bars cold—straight from the fridge. I love slicing them into generous squares and topping each with a dollop of whipped cream, a banana coin, and maybe a sprinkle of crushed vanilla wafers for crunch. If you’re feeling artsy, arrange banana slices on top in a pretty pattern before serving.
Pair these bars with iced coffee, sweet tea, or even a glass of cold milk. At parties, they shine next to light fruit salads, berry compotes, or a platter of salty snacks (the sweet-salty combo is always a hit).
To store, cover the pan tightly with plastic wrap or foil and refrigerate for up to 3 days. The crust stays crisp, and the filling actually gets better as flavors meld. For longer storage, freeze individual bars on a tray until solid, then wrap in parchment and seal in a zip-top bag. Thaw in the fridge before serving—though the whipped topping may lose a bit of its fluff.
Reheat? Nope—these are meant to be enjoyed chilled. If you’re prepping ahead, wait to add fresh banana slices or crunchy toppings until just before serving to keep them from getting soggy or brown. The bars taste even more banana-y on day two, so leftovers are a treat!
Nutritional Information & Benefits
Each bar (assuming 12 per pan) has about 220 kcal, 4g protein, 13g fat, and 22g carbs. Not bad for a dessert that satisfies a sweet tooth! Bananas are a great source of potassium and fiber, plus they add natural sweetness so you can use a bit less added sugar. The recipe can be made gluten-free or dairy-free with simple swaps, and you can cut sugar by using sugar-free pudding and less sweetener in the whipped cream.
Allergens to watch for: dairy (cream, milk, cream cheese), gluten (if not using gluten-free crackers), and possible nuts if you add as a topping. I love that these bars aren’t overloaded with sugar like some bakery treats, and you control what goes in. Sometimes, dessert is about balance—not perfection!
Conclusion
If you’re searching for a dessert that’s simple, nostalgic, and guaranteed to please, these no-bake banana cream pie bars are it. They’re quick to make, easy to adapt, and just as satisfying as a classic pie—without the oven drama. I love how they bring people together, whether it’s at a big celebration or just a regular Tuesday night.
Feel free to riff on the recipe—swap in new fruits, change the crust, or add your favorite toppings. That’s the joy of home baking: making it your own. Honestly, these bars have become a family favorite at our house, and I hope they’ll be one for you too.
Give them a try, and let me know how you make them special! Share your variations or tag me if you post a photo. Happy no-baking, and enjoy every creamy, dreamy bite.
FAQs About No-Bake Banana Cream Pie Bars
How do I keep the bananas from turning brown?
Slice bananas just before assembling, and completely cover them with filling or whipped topping to limit air exposure. A quick dip in lemon juice can help too, but it’s optional.
Can I make these bars ahead of time?
Absolutely! They’re best after chilling for at least 2 hours, and up to 24 hours in advance. Just add fresh banana slices right before serving for the best look.
Can I freeze no-bake banana cream pie bars?
Yes, freeze individual bars on a tray, then wrap and store in a zip-top bag. Thaw in the fridge before serving. The texture of the whipped topping may change a bit, but the flavor stays great.
What’s the best way to slice the bars cleanly?
Run a sharp knife under hot water, wipe dry, and cut. Repeat between slices for neat edges. Chilling the bars longer also helps them hold their shape.
Can I use homemade pudding instead of instant?
You can, but the filling may be softer and less stable. If you have a favorite homemade vanilla pudding, let it cool completely before using, and consider adding a little extra thickener for structure.
Pin This Recipe!

No-Bake Banana Cream Pie Bars
- Total Time: 2 hours 20 minutes (includes chilling)
- Yield: 12 bars 1x
Description
These no-bake banana cream pie bars feature a buttery graham cracker crust, creamy banana pudding filling, and fluffy whipped topping—all layered up for an easy, crowd-pleasing dessert. Perfect for parties, potlucks, or a nostalgic treat without turning on the oven.
Ingredients
- 2 cups graham cracker crumbs (about 14 crackers, crushed very fine)
- 1/2 cup unsalted butter, melted
- 1/4 cup granulated sugar
- Pinch salt
- 2 packages (3.4 oz each) instant vanilla pudding mix
- 2 1/2 cups whole milk
- 2 large ripe bananas, sliced
- 8 oz cream cheese, softened
- 1/2 cup powdered sugar
- 1 tsp pure vanilla extract
- 1 cup heavy whipping cream
- 3 tbsp powdered sugar
- 1/2 tsp vanilla extract
- Optional: extra banana slices for topping
- Optional: mini vanilla wafers or graham cracker pieces
- Optional: toasted coconut flakes or chocolate shavings
Instructions
- Prepare the crust: In a medium bowl, combine graham cracker crumbs, granulated sugar, and a pinch of salt. Stir in melted butter until the mixture resembles wet sand. Press firmly into the bottom of a lined 8×8-inch pan. Chill in the fridge while preparing the filling.
- Mix the pudding: In a large bowl, whisk together instant vanilla pudding mix and cold milk for about 2 minutes until thickened. Let sit for 3-5 minutes to set.
- Blend the cream cheese: In another bowl, beat softened cream cheese with powdered sugar and vanilla extract until smooth and fluffy.
- Combine filling layers: Fold the cream cheese mixture into the pudding until fully combined. Gently fold in sliced bananas.
- Assemble the bars: Spread the banana cream filling over the chilled crust and smooth the top.
- Make the whipped topping: In a chilled bowl, whip heavy cream with powdered sugar and vanilla until stiff peaks form.
- Top and chill: Spread whipped cream over the filling. Cover and chill for at least 2 hours (4 hours is best) to set.
- Slice and serve: Just before serving, add extra banana slices or other garnishes. Slice with a sharp knife run under hot water for clean edges. Serve cold.
Notes
For best results, chill the bars for at least 4 hours for clean slices. Use ripe but not mushy bananas. Chill your bowl and beaters before whipping cream for the fluffiest topping. For gluten-free, use gluten-free graham crackers. Add garnishes like banana slices or chocolate shavings just before serving to keep them fresh.
- Prep Time: 20 minutes
- Cook Time: 0 minutes
- Category: Dessert
- Cuisine: American
Nutrition
- Serving Size: 1 bar (1/12 of pan)
- Calories: 220
- Sugar: 13
- Sodium: 180
- Fat: 13
- Saturated Fat: 8
- Carbohydrates: 22
- Fiber: 1
- Protein: 4
Keywords: no-bake, banana cream pie, dessert bars, easy dessert, party dessert, summer dessert, potluck, creamy, graham cracker crust, whipped cream, pudding, family favorite