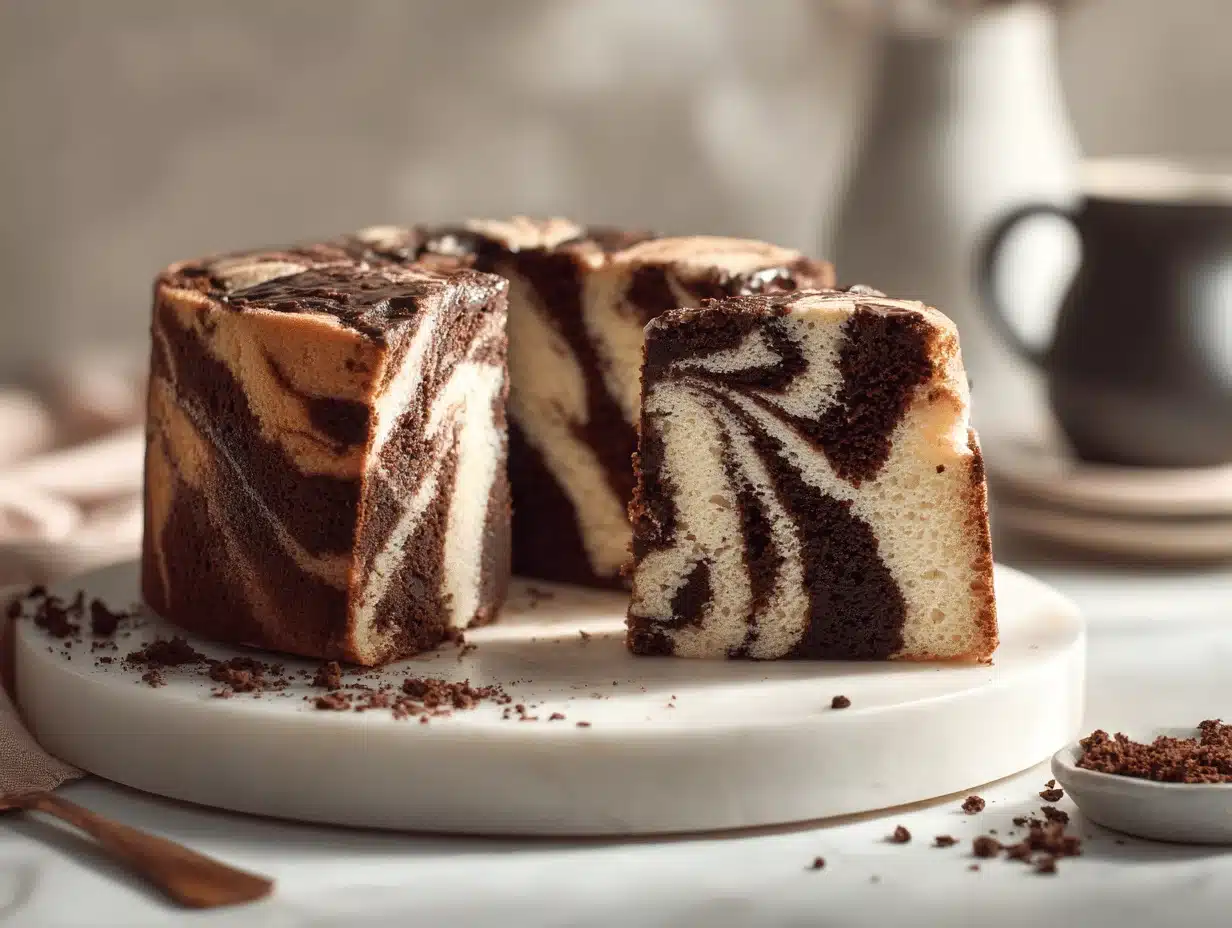
The first time I sliced into a marble cake, I remember being awestruck by the beautiful swirls—vanilla and chocolate, all tangled up in a soft, moist crumb. It’s a little like magic every single time. The aroma of butter, sugar, and cocoa wafting through my kitchen has become my personal signal that something wonderful is about to happen. Honestly, marble cake always feels like a celebration, whether it’s a big birthday bash or just a midweek treat to brighten a gloomy day.
I stumbled upon my quest for the best marble cake recipe after a birthday where my son couldn’t decide between chocolate and vanilla. Rather than picking sides, I decided to swirl both together—best decision ever. After testing (and tasting!) countless versions over the years, I’m convinced this—right here—is the moist marble cake you’ll come back to. Whether you’re baking for a birthday, a holiday, or just a cozy Sunday afternoon, this cake delivers every time.
What makes this marble cake stand out isn’t just the stunning pattern inside—it’s the impossibly tender crumb and the flavor that somehow balances rich chocolate with delicate vanilla. Plus, you don’t need any fancy ingredients or complicated steps. I’ve baked this for kids’ parties, brought it to potlucks, and even made it as cupcakes for school bake sales—every time, it’s gobbled up before I can blink. If you love simple, moist cakes that look as good as they taste, you’ll fall head over heels for this recipe. Trust me, after baking this marble cake more times than I can count, I’ve learned all the tricks to get it just right.
Why You’ll Love This Marble Cake Recipe
- Quick & Easy: This marble cake comes together in under 25 minutes of prep, so it’s perfect for busy bakers or last-minute birthday plans.
- Simple Ingredients: No weird specialty foods here—just basic pantry staples like flour, eggs, and cocoa. You might already have everything you need.
- Perfect for Birthdays & Celebrations: The pretty swirl pattern makes this cake a show-stopper for birthdays, holidays, or any “just because” party.
- Crowd-Pleaser: Kids love the chocolate AND vanilla combo, and adults are always impressed by the soft, bakery-style texture.
- Unbelievably Delicious: Think rich, buttery vanilla cake with decadent chocolate ribbons—moist, fluffy, and never dry.
Here’s what makes my version different from all the rest: I use a touch of sour cream (or Greek yogurt if that’s what you have) for extra tenderness—no dry crumbs here! My swirling technique is foolproof (I’ve practiced a ton). And you don’t need a stand mixer—just a whisk and a bowl. This recipe is about celebrating, not stressing.
If you’ve ever eaten a dry marble cake (ugh, I know the disappointment), you’ll be amazed at how soft and moist this one stays, even after a couple of days. It’s the kind of cake that makes you pause after the first bite and just savor. For birthdays, it’s the ultimate “wow” moment when you cut into the swirls. For everyday treats, it’s a hug in cake form. I promise, you’ll want to make this again and again.
What Ingredients You Will Need
This marble cake recipe uses classic, easy-to-find ingredients. Each one plays a role in making the cake moist, flavorful, and beautiful. Here’s what you’ll need:
- For the Cake Batter:
- All-purpose flour (240g / 2 cups) – Stick with classic AP flour for the best structure. I like King Arthur or Bob’s Red Mill for consistent results.
- Granulated sugar (200g / 1 cup) – White sugar keeps the cake light and sweet.
- Unsalted butter (113g / 1/2 cup, softened) – For rich, buttery flavor. Salted butter works in a pinch; just reduce the added salt.
- Large eggs (3, room temperature) – They give structure and help the cake rise. Room temp eggs mix in more easily.
- Whole milk (120ml / 1/2 cup, room temperature) – Adds moisture. You can use 2% or even almond milk in a pinch, but whole milk gives the richest crumb.
- Sour cream (120g / 1/2 cup) – The secret to extra-moist cake! Greek yogurt works great too.
- Pure vanilla extract (2 tsp) – Go for real vanilla if you can. It makes a difference!
- Baking powder (2 tsp) – For lift and a soft crumb.
- Salt (1/2 tsp) – Balances out the sweetness.
- For the Chocolate Swirl:
- Unsweetened cocoa powder (20g / 1/4 cup) – Dutch-process or natural; I love Hershey’s Special Dark for a deeper chocolate flavor.
- Extra milk (1-2 tbsp) – To loosen the chocolate batter for easier swirling.
- Optional: instant espresso powder (1/2 tsp) – Deepens the chocolate flavor but isn’t required.
Ingredient Tips:
– Flour: Spoon and level for accurate measuring—too much can make your cake dense.
– Butter: Softened, not melted. If you forget, cut it into cubes and let it sit out for 20 minutes.
– Eggs & Dairy: Room temperature blends better and rises higher.
– Cocoa: Sift if it’s clumpy for a smoother swirl.
– For gluten-free: Use a cup-for-cup gluten-free blend. For dairy-free, sub in vegan butter and coconut yogurt.
If you want to get fancy, you can add a handful of mini chocolate chips to the chocolate batter or a bit of orange zest to the vanilla for a fun twist. But even as written, this is the best marble cake recipe for birthdays—or any time you want something a little special.
Equipment Needed
You don’t need a commercial kitchen to bake this moist marble cake—just a few basics and maybe one special pan if you want to go classic. Here’s what I use:
- 9×5-inch loaf pan (or 8-inch round cake pan) – Loaf pans give tall, gorgeous slices. If you only have a round pan, it works too—just watch the bake time.
- Mixing bowls – At least two: one for the main batter, one for the chocolate swirl.
- Hand whisk and spatula – No electric mixer required, but a hand mixer makes creaming the butter easier.
- Measuring cups and spoons – For accuracy. If you have a kitchen scale, even better—less mess, more precision.
- Sifter or fine mesh sieve – For the cocoa powder (optional, but helps avoid lumps in the swirl).
- Toothpick or butter knife – For swirling the batters together. A skewer works too.
Personal note: I’ve baked this cake in both glass and metal pans—metal gives a slightly quicker, more even bake. If you use glass, reduce the temperature by 10°F (about 5°C). For easy cleanup, line your pan with parchment. And if you’re on a budget, dollar store bowls and whisks totally get the job done—no shame in that!
How to Make the Best Marble Cake (Step-by-Step)

- Prep your pan and ingredients (5 minutes):
Grease a 9×5-inch (23x13cm) loaf pan and line it with parchment, leaving some overhang for easy lifting. Preheat your oven to 350°F (175°C). Bring eggs, butter, and milk to room temperature for the fluffiest texture. Trust me, it’s worth the wait. - Mix the dry ingredients (2 minutes):
In a medium bowl, whisk together 2 cups (240g) all-purpose flour, 2 tsp baking powder, and 1/2 tsp salt. Set aside. If your flour is lumpy, sift it for extra lightness. - Cream the butter and sugar (3 minutes):
In a large bowl, beat 1/2 cup (113g) softened butter and 1 cup (200g) sugar until pale and fluffy. If mixing by hand, use some elbow grease! The mixture should look light and creamy. - Add eggs and vanilla (2 minutes):
Beat in 3 large eggs, one at a time, scraping down the bowl after each. Stir in 2 tsp vanilla extract. If the batter looks a little curdled, don’t worry—it’ll smooth out. - Add sour cream and milk (2 minutes):
Mix in 1/2 cup (120g) sour cream. Then gently stir in 1/2 cup (120ml) whole milk until just combined. Don’t overmix or the cake can get tough. - Combine with dry ingredients (2 minutes):
Add the dry mixture to the wet in two batches, folding gently with a spatula. Batter should be thick but smooth—if it’s super stiff, add 1 tbsp more milk. - Make the chocolate swirl (3 minutes):
Spoon 1 cup of batter into a separate bowl. Sift in 1/4 cup (20g) cocoa powder and 1-2 tbsp extra milk. Stir until smooth and chocolatey. Add 1/2 tsp espresso powder if using. - Layer and swirl the batters (3 minutes):
Dollop vanilla and chocolate batters alternately into the pan. Use a butter knife or skewer to gently swirl the batters together—don’t overdo it or you’ll lose the marbling. - Bake (45-55 minutes):
Bake on the middle rack for 45-55 minutes. The cake is done when a toothpick inserted in the center comes out with a few moist crumbs (not wet batter). If the top browns too fast, tent loosely with foil after 35 minutes. - Cool and unmold (10 minutes):
Let the cake cool in the pan for 10 minutes, then lift out using the parchment. Cool completely on a rack before slicing. If you cut while it’s hot, the swirl can smear—learned that the hard way!
Troubleshooting: If your cake sinks, it’s usually underbaked or the oven was too hot. If it’s dry, check your flour measurements—scoop and level, don’t pack. If your swirl disappears, just swirl a little less next time. You’ll get the hang of it!
Cooking Tips & Techniques
After years of birthday cakes, bake sales, and even a few “oops” moments, here’s what I’ve learned about making the best marble cake every time:
- Don’t overmix after adding flour. Too much stirring can make your cake tough. Gently fold until just combined.
- Room temperature is key. Cold eggs or butter can make your batter split or bake unevenly. Take the chill off before starting (I sometimes stick eggs in warm water for a few minutes if I forget).
- Swirling technique matters. Use a butter knife or skewer, and make just a couple of figure-eight motions. More than that, and you’ll lose the pretty pattern.
- Watch your oven. Every oven is different. If your cake is browning too quickly, check the temperature with an oven thermometer—mine runs a little hot, so I adjust down by 10°F.
- Moisture insurance. Adding sour cream (or Greek yogurt) keeps the crumb tender. If you skip it, your cake may end up dry.
- Check for doneness early. Start checking at 40 minutes. Insert a toothpick into the center—look for a few moist crumbs, not wet batter. Overbaking is the enemy of moist marble cake!
One time, I forgot to sift my cocoa powder, and the chocolate swirl had little lumps—still tasty, but not as pretty. Now I always sift! And if you want the perfect slice for a birthday photo, use a serrated knife and wipe it between cuts. Honestly, these little things make all the difference.
Variations & Adaptations
One thing I love about this marble cake recipe is how easy it is to tweak for different tastes and needs. Here are a few ways you can make it your own:
- Gluten-Free: Swap the all-purpose flour for a 1:1 gluten-free baking blend. I’ve tried Bob’s Red Mill and it works great—just remember to check for even baking, as gluten-free cakes sometimes need a few extra minutes.
- Dairy-Free: Use plant-based butter (like Earth Balance), almond or oat milk, and coconut yogurt in place of sour cream. The flavor is a bit different, but still delicious and moist.
- Seasonal Flavors: Add 1 tsp orange zest to the vanilla batter for a chocolate-orange marble cake, or a pinch of cinnamon for a cozy winter version.
- Extra Chocolate: Stir in a handful of mini chocolate chips to the chocolate batter for double chocolate swirls. My kids beg for this at every birthday!
- Different Shapes: Make cupcakes (bake 18-22 minutes) or a bundt cake (increase bake time to 55-65 minutes). Cupcakes are so fun for parties.
- Nut-Free: This cake is naturally nut-free, but if you want a nutty swirl, add a spoonful of hazelnut spread to the chocolate batter.
Personally, my favorite twist is the orange zest version for grown-up birthdays—it feels a little fancy without any extra work. Don’t be afraid to experiment. This recipe is forgiving and fun!
Serving & Storage Suggestions
For best flavor and texture, serve this moist marble cake at room temperature. The swirl pattern looks gorgeous on a white platter, dusted with a little powdered sugar or topped with fresh berries.
- Serve with: A scoop of vanilla ice cream for birthdays, or a dollop of whipped cream for a lighter touch. Coffee, tea, or cold milk are perfect pairings.
- Storage: Store leftover cake in an airtight container at room temperature for up to 3 days. If your kitchen is warm, keep it in the fridge to prevent spoilage—just let slices come to room temp before serving for best taste.
- Freezing: Wrap individual slices tightly in plastic wrap and freeze for up to 2 months. Thaw overnight in the fridge or on the counter for a quick treat.
- Reheating: Briefly warm slices in the microwave (10-15 seconds) to bring back that just-baked softness. The chocolate swirl gets wonderfully fudgy!
- Make-ahead tip: Bake the cake a day in advance—the flavors deepen and the crumb stays moist.
Honestly, the cake rarely lasts long enough in my house to make it to the freezer. But if you’re prepping for a party, having a few slices tucked away is a lifesaver for last-minute guests (or midnight snacks—I won’t judge!).
Nutritional Information & Benefits
This marble cake recipe makes about 10 generous slices. Here’s an estimate per slice (without icing):
- Calories: ~270
- Fat: 13g
- Carbohydrates: 34g
- Protein: 5g
- Sugar: 17g
Key benefits: Thanks to the eggs and dairy, you get a little protein and calcium along with your treat. Using cocoa powder adds a touch of antioxidants. If you choose the gluten-free or dairy-free adaptation, it’s great for those with allergies or sensitivities. Just remember, this is still a cake—enjoy it as a special part of your celebrations!
Personally, I find that a homemade birthday cake like this is so much more satisfying than store-bought—no artificial flavors, just real ingredients and plenty of love baked in.
Conclusion
If you’re looking for the best marble cake recipe—one that’s moist, simple, and perfect for birthdays—this is it. The gorgeous swirls, the buttery crumb, and the way it melts in your mouth make it a winner every single time.
Don’t be afraid to tweak the flavors, add your favorite touches, or serve it in fun ways. That’s the beauty of homemade cake—there’s always room for your own spin. Honestly, I make this marble cake for every birthday in my family, and it never fails to bring smiles and requests for seconds.
If you try this recipe, I’d love to hear how it turned out! Leave a comment, share your own twists, or tag me in your cake photos. Let’s keep the birthday magic (and those chocolate-vanilla swirls) going, one slice at a time.
Frequently Asked Questions
How do I get the best swirl pattern in marble cake?
Spoon the batters into the pan in alternating dollops and use a butter knife to gently swirl just a few times. Too much swirling will blend the batters together instead of creating distinct patterns.
Can I make marble cake in advance?
Yes! Marble cake stays moist for several days. Bake a day ahead and store tightly wrapped at room temperature or in the fridge. The flavors actually deepen overnight.
Is this marble cake recipe good for cupcakes?
Absolutely. Just divide the batter among cupcake liners and bake for 18-22 minutes. Swirl each cupcake with a toothpick for mini marbled treats.
How do I know when marble cake is done baking?
Insert a toothpick into the center. If it comes out with just a few moist crumbs (not wet batter), it’s done. Start checking at 40 minutes to avoid overbaking.
Can I freeze marble cake?
Definitely! Slice the cake, wrap slices tightly, and freeze for up to 2 months. Thaw at room temperature or in the fridge before enjoying.
Pin This Recipe!
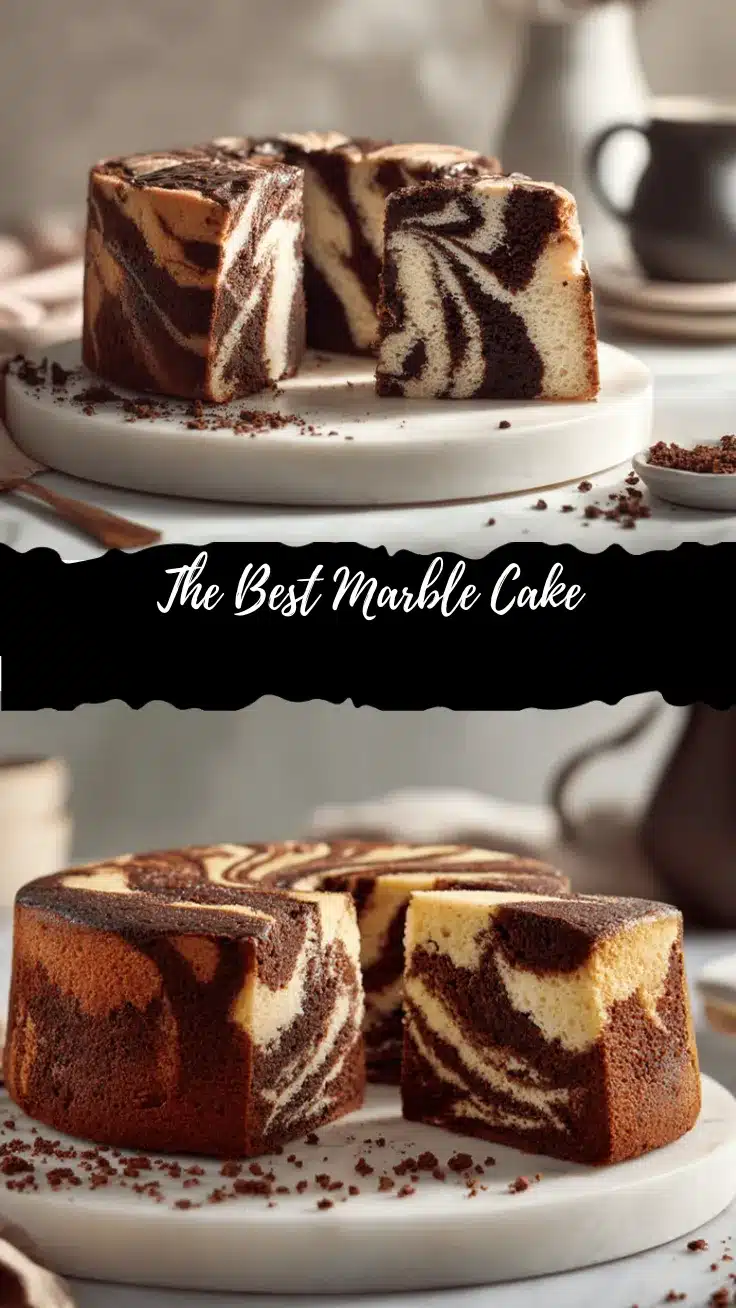

Marble Cake Recipe – Best Moist & Easy Birthday Cake Idea
- Total Time: 1 hour 10 minutes
- Yield: 10 servings 1x
Description
This moist marble cake features beautiful chocolate and vanilla swirls in a tender, buttery crumb. It’s easy to make with simple pantry ingredients and is perfect for birthdays, celebrations, or any time you want a show-stopping homemade treat.
Ingredients
- 2 cups (240g) all-purpose flour
- 1 cup (200g) granulated sugar
- 1/2 cup (113g) unsalted butter, softened
- 3 large eggs, room temperature
- 1/2 cup (120ml) whole milk, room temperature
- 1/2 cup (120g) sour cream (or Greek yogurt)
- 2 teaspoons pure vanilla extract
- 2 teaspoons baking powder
- 1/2 teaspoon salt
- 1/4 cup (20g) unsweetened cocoa powder (Dutch-process or natural)
- 1–2 tablespoons extra milk (for chocolate swirl)
- 1/2 teaspoon instant espresso powder (optional, for chocolate swirl)
Instructions
- Grease a 9×5-inch loaf pan and line with parchment paper, leaving overhang for easy lifting. Preheat oven to 350°F (175°C). Bring eggs, butter, and milk to room temperature.
- In a medium bowl, whisk together flour, baking powder, and salt. Set aside.
- In a large bowl, beat softened butter and sugar until pale and fluffy.
- Beat in eggs one at a time, then stir in vanilla extract.
- Mix in sour cream, then gently stir in milk until just combined.
- Add dry ingredients to wet in two batches, folding gently with a spatula until batter is thick but smooth.
- Spoon 1 cup of batter into a separate bowl. Sift in cocoa powder and add 1-2 tablespoons extra milk (and espresso powder if using). Stir until smooth.
- Dollop vanilla and chocolate batters alternately into the pan. Use a butter knife or skewer to gently swirl the batters together.
- Bake on the middle rack for 45-55 minutes, until a toothpick inserted in the center comes out with a few moist crumbs.
- Cool in the pan for 10 minutes, then lift out using parchment and cool completely on a rack before slicing.
Notes
For best results, use room temperature ingredients and avoid overmixing after adding flour. Sift cocoa powder for a smooth swirl. Start checking for doneness at 40 minutes to prevent overbaking. For gluten-free or dairy-free adaptations, use a 1:1 gluten-free flour blend and plant-based dairy substitutes. Cake can be made ahead and stays moist for several days.
- Prep Time: 25 minutes
- Cook Time: 45-55 minutes
- Category: Dessert
- Cuisine: American
Nutrition
- Serving Size: 1 slice (1/10 of cake)
- Calories: 270
- Sugar: 17
- Sodium: 180
- Fat: 13
- Saturated Fat: 7
- Carbohydrates: 34
- Fiber: 1
- Protein: 5
Keywords: marble cake, birthday cake, moist cake, chocolate vanilla swirl, easy cake recipe, loaf cake, homemade cake, party dessert