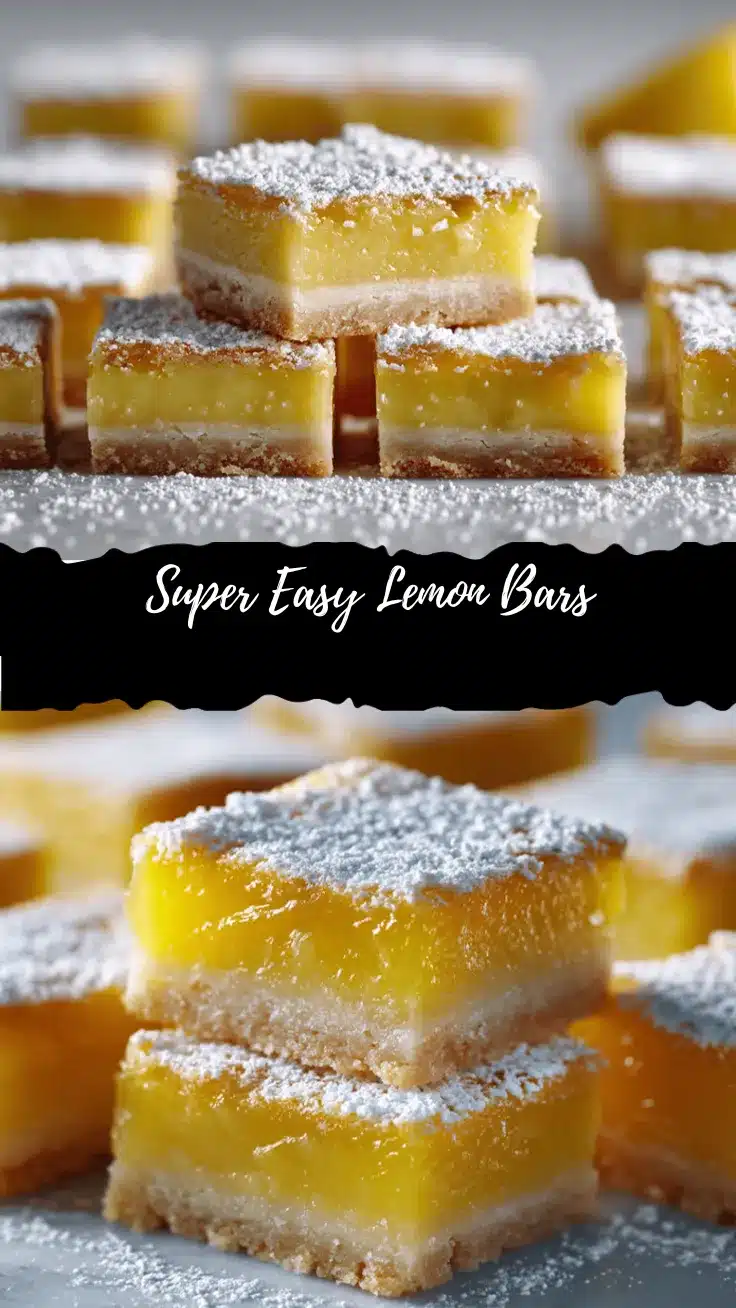
The moment you zest a lemon and that bright citrus scent fills your kitchen, you just know something magical is about to happen. That’s exactly what drew me in the first time I made these super easy lemon bars—one whiff and suddenly, I was whisked away to lazy summer afternoons and backyard picnics. I still remember the first batch: golden, buttery crust, a silky lemon layer, and a dusting of powdered sugar that looked like a sprinkle of sunshine. It was pure joy, honestly. Ever since, these lemon bars have become my go-to recipe for when I want something sweet, tangy, and totally fuss-free.
Why are lemon bars so special? It’s the perfect balance of tart and sweet, the way the shortbread crust melts in your mouth, and how just a few simple ingredients come together like magic. I’ve tweaked and tested this lemon bars recipe easy enough for a weeknight bake, but impressive enough for any party or potluck. They’re a huge hit with my family—my kids request them every summer, and even my picky aunt can’t resist a second helping! Plus, these bars are a lifesaver when you need a make-ahead dessert for a crowd or just want a little treat with your afternoon coffee.
As someone who’s baked these at least twenty times (yes, I’m a little obsessed), I can promise: if you want a summery dessert that’s simple, delicious, and guaranteed to make you smile, this is the lemon bars recipe easy enough for anyone. So grab your lemons—let’s make something unforgettable.
Why You’ll Love This Lemon Bars Recipe
- Quick & Easy: No complicated steps. Just mix, bake, and slice—done in about an hour, start to finish!
- Simple Ingredients: Everything you need is probably already in your pantry or fridge. No fancy stuff, just honest-to-goodness basics.
- Perfect for Summer Parties: These lemon bars are a hit at picnics, BBQs, and potlucks. They travel well and look gorgeous on any dessert table.
- Crowd Pleaser: Kids love the sweet-tart flavor, and adults always come back for more. I’ve even had folks ask for the recipe before finishing their first bar!
- Unbelievably Delicious: Think creamy, zesty lemon filling on a buttery shortbread crust, all dusted with a cloud of powdered sugar. It’s sunshine in dessert form.
What sets my lemon bars recipe easy apart? The crust is just thick enough to hold the filling but light enough to melt away with every bite. I use fresh lemon juice and zest for that bold, natural flavor—no bottled stuff here. My secret trick: a pinch of salt in both layers, which really makes the lemon “pop.” If you’ve ever found lemon bars too cloying or too eggy, this version fixes that. It’s balanced, bright, and honestly, a little addictive.
Beyond taste, these bars are just so versatile. I love making them ahead for busy weekends, and they hold up beautifully in the fridge. There’s something so comforting about a recipe you can rely on, you know? Plus, with just a handful of steps, you’re never far from homemade dessert happiness. If you’re looking for the ultimate lemon bars recipe easy enough for any baker, this is it.
What Ingredients You Will Need
This lemon bars recipe easy keeps things simple, but every ingredient plays a key role. Here’s what you’ll need to whip up a batch of sunshine:
- For the Shortbread Crust:
- All-purpose flour (1 cup/120g) – forms the base and gives that crumbly texture.
- Unsalted butter (1/2 cup/113g, cold and cubed) – for rich, melt-in-your-mouth flavor. I love Kerrygold for extra creaminess.
- Powdered sugar (1/4 cup/30g) – sweetens and softens the crust just right.
- Salt (1/4 tsp) – a little goes a long way to balance sweetness.
- For the Lemon Filling:
- Large eggs (2, room temperature) – gives body and sets the filling.
- Granulated sugar (1 cup/200g) – for that perfect sweet-tart balance.
- Fresh lemon juice (1/3 cup/80ml, about 2-3 lemons) – brings the zing! Bottled just won’t taste the same.
- Lemon zest (1 tbsp, finely grated) – amps up the citrus flavor. Microplane zesters work wonders here.
- All-purpose flour (2 tbsp/16g) – helps thicken the filling so it cuts cleanly.
- Salt (pinch) – ties everything together and sharpens the lemon.
- For Finishing:
- Powdered sugar (for dusting) – makes them look extra inviting and adds a touch of sweetness.
Ingredient notes and swaps:
- If you need gluten-free: use a 1-to-1 gluten-free all-purpose flour blend for both the crust and filling.
- Vegan? Swap butter for a plant-based alternative (like Miyoko’s), and use an egg replacer for the filling (though texture may vary a bit).
- Want a lighter bar? Try using half sugar in the filling, but keep in mind the tang will be even more pronounced.
- For extra flavor, add a bit of vanilla extract (1/2 tsp) to the filling. Sometimes I do this for a subtle twist!
- Store-bought lemons are fine, but if you can get Meyer lemons, they make for a sweeter, floral bar—great for spring gatherings.
Honestly, the best part is how forgiving this recipe is. As long as you use fresh lemon juice and real butter, you’re already 90% of the way there!
Equipment Needed
- 8×8-inch (20x20cm) baking pan: The perfect size for thick, bakery-style bars. Glass works best for even browning, but metal is fine too.
- Parchment paper: Makes lifting out (and slicing) the bars a breeze. If you don’t have it, just grease the pan well.
- Mixing bowls: One for the crust, one for the filling. I use sturdy glass bowls, but any will do.
- Measuring cups and spoons: Precision matters for the lemon filling, so level off your flour and sugar.
- Whisk: For blending eggs, sugar, and lemon until smooth. A fork works in a pinch.
- Pastry cutter or two forks: For blending butter into the crust. I’ve even used my (clean) hands when feeling lazy—works, but it’s a bit messier!
- Microplane or fine grater: For zesting lemons. Don’t skip this—zest adds so much flavor.
- Sharp knife: For cutting the finished bars into neat squares. Wipe between cuts for clean edges.
- Cooling rack: Cools the bars evenly. If you don’t have one, just cool on a heat-safe surface.
If you’re on a budget, you can use a regular cake pan (just watch for over-browning at the edges), and a cheese grater for zesting. I’ve definitely made these with just the basics—no fancy gear required! Just be sure to keep your tools clean, especially when working with eggs and citrus. A little extra care goes a long way toward a perfect batch of lemon bars.
How to Make Lemon Bars in 6 Steps

-
Prep your pan and oven (5 minutes):
Preheat your oven to 350°F (175°C). Line an 8×8-inch (20x20cm) baking pan with parchment paper, leaving an overhang on two sides for easy lifting. (If you skip parchment, generously grease the pan.) This step saves you from stuck-on bars later. -
Make the shortbread crust (10 minutes):
In a medium bowl, combine 1 cup (120g) all-purpose flour, 1/4 cup (30g) powdered sugar, and 1/4 tsp salt. Add 1/2 cup (113g) cold unsalted butter, cubed. Use a pastry cutter, two forks, or your fingertips to blend until the mixture resembles coarse crumbs. Press firmly and evenly into the pan. Don’t worry if it looks a little rustic—imperfection is part of the charm! -
Bake the crust (18-20 minutes):
Bake on the center rack for 18–20 minutes, or until lightly golden at the edges. It should smell buttery and just start to brown. Let it cool slightly while you make the filling—about 5 minutes is plenty. -
Mix the lemon filling (5 minutes):
In a clean bowl, whisk together 2 large eggs, 1 cup (200g) granulated sugar, 1/3 cup (80ml) fresh lemon juice, 1 tbsp lemon zest, 2 tbsp (16g) all-purpose flour, and a pinch of salt. Whisk until smooth and slightly foamy. If you see any lumps, keep whisking—they’ll smooth out. (If using very juicy lemons, measure carefully!) -
Pour and bake again (20-22 minutes):
Pour the lemon filling over the warm crust. Gently tap the pan on the counter to release air bubbles. Bake for 20–22 minutes, or until the filling is set but still slightly jiggly in the center. If you notice bubbles or browning at the edges, that’s normal—just don’t overbake or the bars will be dry. -
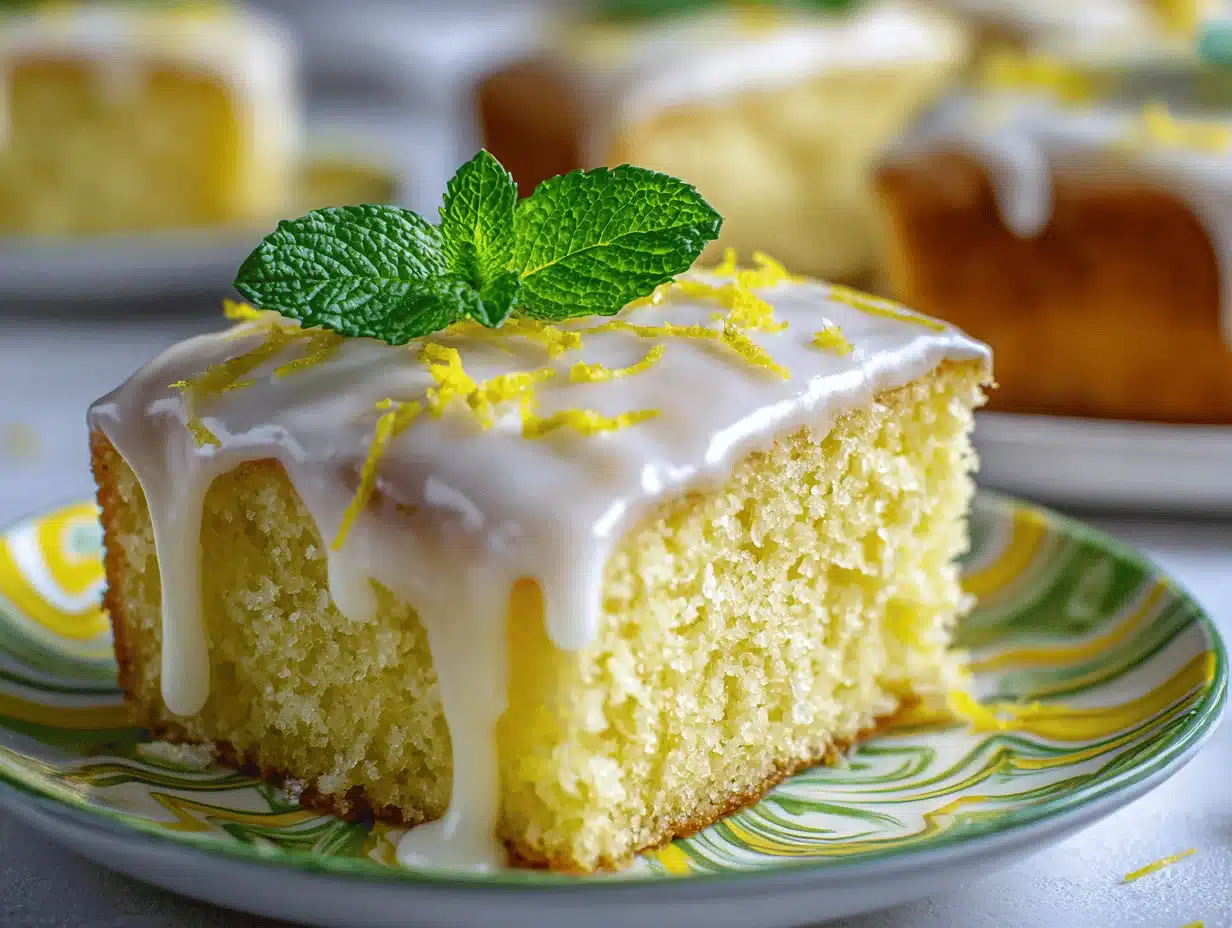
Cool, dust, and slice (30–60 minutes):
Cool the bars in the pan for at least 30 minutes, then lift them out using the parchment. Chill in the fridge for an hour if you prefer cleaner cuts. Dust generously with powdered sugar, then slice into 16 squares. Wipe your knife between slices for picture-perfect bars—trust me, it’s worth the extra effort!
Troubleshooting: If your crust crumbles, it needed more pressing. If the filling is runny, it probably needed a couple more minutes. And if your bars stick, next time use parchment—learned that one the hard way!
Cooking Tips & Techniques for Perfect Lemon Bars
- Use cold butter for the crust: It keeps the base crisp and helps you get that signature shortbread snap. Don’t let it soften too much, or the crust can turn greasy.
- Don’t overmix the filling: Whisk just until combined—overmixing can make the bars foamy or tough. If you want the filling extra silky, strain it through a fine sieve before pouring over the crust.
- Watch the bake time: Every oven’s a little different. Start checking at the lower end of the suggested time. The center should wobble just slightly when you jiggle the pan—it’ll firm up as it cools.
- Cut with a warm, clean knife: Dip your knife in hot water and wipe between cuts. This gives you super neat edges (makes a big difference for Pinterest-worthy pics!).
- Chill for firmer bars: If you like your lemon bars extra tidy, refrigerate for an hour before slicing. I used to skip this step, but honestly, it makes serving so much easier—especially in hot weather.
- Don’t skip the zest: The zest is where all the lemon oil lives. It’s what gives these bars their bright, fresh flavor. I once forgot it and, trust me, the bars just weren’t the same.
One mistake I made early on was pouring the filling onto a cold crust—don’t do it! The warm crust helps the filling set evenly and prevents a soggy base. Also, don’t panic if your bars seem soft after baking; they firm up beautifully once cool. If you’re multitasking, prep your lemons while the crust bakes—that way, you’re ready to go as soon as it comes out of the oven. These little steps make baking lemon bars easy and stress-free every time.
Variations & Adaptations
- Gluten-Free Lemon Bars: Swap both crust and filling flour for a gluten-free 1-to-1 blend. I’ve tried Bob’s Red Mill and it works like a charm—no one noticed the swap.
- Meyer Lemon Bars: Use Meyer lemons for a sweeter, slightly floral twist. You may want to reduce the sugar by a tablespoon or two if your lemons are extra sweet.
- Berry Lemon Bars: Gently swirl in 1/2 cup (75g) fresh raspberries or blueberries into the filling before baking. This adds a pop of color and a juicy surprise in every bite.
- Vegan Lemon Bars: Use plant-based butter and an egg replacer (like flax eggs or a commercial mix) for the filling. The texture will be a bit softer, but the flavor still shines.
- Nutty Crust: Add 1/4 cup (25g) finely chopped toasted almonds or pecans to the crust for a crunchy layer. My family loves this version for extra depth.
- Extra Tangy: Add a tablespoon of extra lemon zest to the filling, or reduce the sugar slightly for a puckery treat.
If you’re avoiding eggs due to allergies, try using aquafaba (the liquid from canned chickpeas) as a binder—about 6 tbsp per 2 eggs. I’ve baked a batch this way for a friend with egg allergies, and it turned out surprisingly well! Feel free to play around with flavors—these lemon bars are a blank canvas for your creativity.
Serving & Storage Suggestions
Lemon bars are best served slightly chilled or at cool room temperature—on a hot day, they’re the ultimate refreshing treat. Arrange them on a pretty platter and dust with a fresh layer of powdered sugar just before serving (it melts if done too far ahead). They pair beautifully with a cup of tea, iced coffee, or a glass of sparkling lemonade.
Storage: Store bars in an airtight container in the fridge for up to 5 days. Place parchment between layers to prevent sticking. For longer storage, freeze bars (cut or whole) tightly wrapped for up to 3 months. Thaw overnight in the fridge—easy peasy.
Reheating: These are best enjoyed cold, but if you like them at room temp, just let them sit out for 10–15 minutes before serving. The flavors actually develop as they chill, making them even better a day after baking. Honestly, I think they taste best on day two!
Nutritional Information & Benefits
Each lemon bar (based on 16 small squares) contains approximately:
- Calories: 130
- Carbohydrates: 21g
- Fat: 5g
- Protein: 2g
- Sugar: 14g
Lemons are loaded with vitamin C, perfect for a little immune boost and that bright citrus flavor. The bars are naturally nut-free, and can easily be made gluten-free or dairy-free with simple swaps. Just a heads-up for folks with allergies: these do contain eggs, wheat, and dairy unless adapted. My personal wellness tip? Enjoy one or two and share the rest—dessert is all about balance and joy!
Conclusion
If you’re looking for a summery dessert that’s easy, gorgeous, and packed with flavor, this lemon bars recipe easy is the answer. I’ve lost count of how many times these bars have saved my dessert table—there’s just something about that zingy lemon and buttery crust that makes everyone smile. Whether you’re a lemon fanatic or just want a no-fuss treat, this recipe is a keeper.
Don’t be afraid to put your own spin on these bars—swap in a new citrus, add berries, or play with the crust. I love hearing about your kitchen adventures, so if you try these, let me know in the comments! Did you find a new favorite twist? Did your kids sneak a second bar before dinner? (Mine always do!)
So go on—grab some lemons, and let’s make this summer a little sweeter, one bar at a time.
Frequently Asked Questions
How do I know when lemon bars are done baking?
The filling should be set around the edges and just a little jiggly in the center. If it’s totally firm, you may have overbaked. It’ll firm up as it cools, so don’t worry if it looks a bit soft coming out of the oven.
Can I make lemon bars ahead of time?
Absolutely! Lemon bars keep well in the fridge for up to 5 days and actually taste better after chilling. Make them a day ahead for stress-free serving.
What’s the best way to cut lemon bars cleanly?
Use a sharp knife dipped in hot water and wiped clean between each cut. Chilling the bars before slicing also helps get nice, tidy squares.
Can I freeze lemon bars?
Yes! Wrap cut bars tightly in plastic wrap and freeze for up to 3 months. Thaw overnight in the fridge—don’t dust with powdered sugar until just before serving.
Why is my lemon filling runny or gooey?
Most likely, the bars needed a few more minutes in the oven. Also, be sure to measure your lemon juice and eggs carefully, and don’t skip the flour in the filling—it helps everything set up nicely.
Pin This Recipe!

Lemon Bars Recipe Easy
- Total Time: 1 hour
- Yield: 16 bars 1x
Description
These easy homemade lemon bars feature a buttery shortbread crust and a tangy, silky lemon filling, all dusted with powdered sugar. Perfect for summer gatherings, they come together in just six simple steps and are a guaranteed crowd-pleaser.
Ingredients
- 1 cup (120g) all-purpose flour (for crust)
- 1/2 cup (113g) unsalted butter, cold and cubed (for crust)
- 1/4 cup (30g) powdered sugar (for crust)
- 1/4 tsp salt (for crust)
- 2 large eggs, room temperature (for filling)
- 1 cup (200g) granulated sugar (for filling)
- 1/3 cup (80ml) fresh lemon juice (about 2–3 lemons, for filling)
- 1 tbsp lemon zest, finely grated (for filling)
- 2 tbsp (16g) all-purpose flour (for filling)
- Pinch of salt (for filling)
- Powdered sugar, for dusting (finishing)
Instructions
- Preheat oven to 350°F (175°C). Line an 8×8-inch baking pan with parchment paper, leaving an overhang on two sides for easy lifting, or grease the pan well.
- In a medium bowl, combine 1 cup flour, 1/4 cup powdered sugar, and 1/4 tsp salt. Add 1/2 cup cold, cubed butter. Blend with a pastry cutter, two forks, or your fingers until the mixture resembles coarse crumbs. Press firmly and evenly into the prepared pan.
- Bake the crust for 18–20 minutes, or until lightly golden at the edges. Let cool slightly (about 5 minutes) while preparing the filling.
- In a clean bowl, whisk together 2 eggs, 1 cup granulated sugar, 1/3 cup fresh lemon juice, 1 tbsp lemon zest, 2 tbsp flour, and a pinch of salt until smooth and slightly foamy.
- Pour the lemon filling over the warm crust. Tap the pan gently to release air bubbles. Bake for 20–22 minutes, or until the filling is set but still slightly jiggly in the center.
- Cool the bars in the pan for at least 30 minutes, then lift out using parchment. Chill in the fridge for an hour for cleaner cuts. Dust generously with powdered sugar and slice into 16 squares, wiping the knife between cuts.
Notes
For gluten-free bars, use a 1-to-1 gluten-free flour blend. For vegan, substitute plant-based butter and an egg replacer. Use cold butter for a crisp crust and don’t overmix the filling. Chill before slicing for neat bars. Store in the fridge for up to 5 days or freeze for up to 3 months. Dust with powdered sugar just before serving.
- Prep Time: 15 minutes
- Cook Time: 40 minutes
- Category: Dessert
- Cuisine: American
Nutrition
- Serving Size: 1 bar (1/16 of recipe)
- Calories: 130
- Sugar: 14
- Sodium: 60
- Fat: 5
- Saturated Fat: 3
- Carbohydrates: 21
- Protein: 2
Keywords: lemon bars, easy lemon bars, summer dessert, lemon dessert, homemade lemon bars, shortbread crust, picnic dessert, potluck dessert, citrus bars, best lemon bars