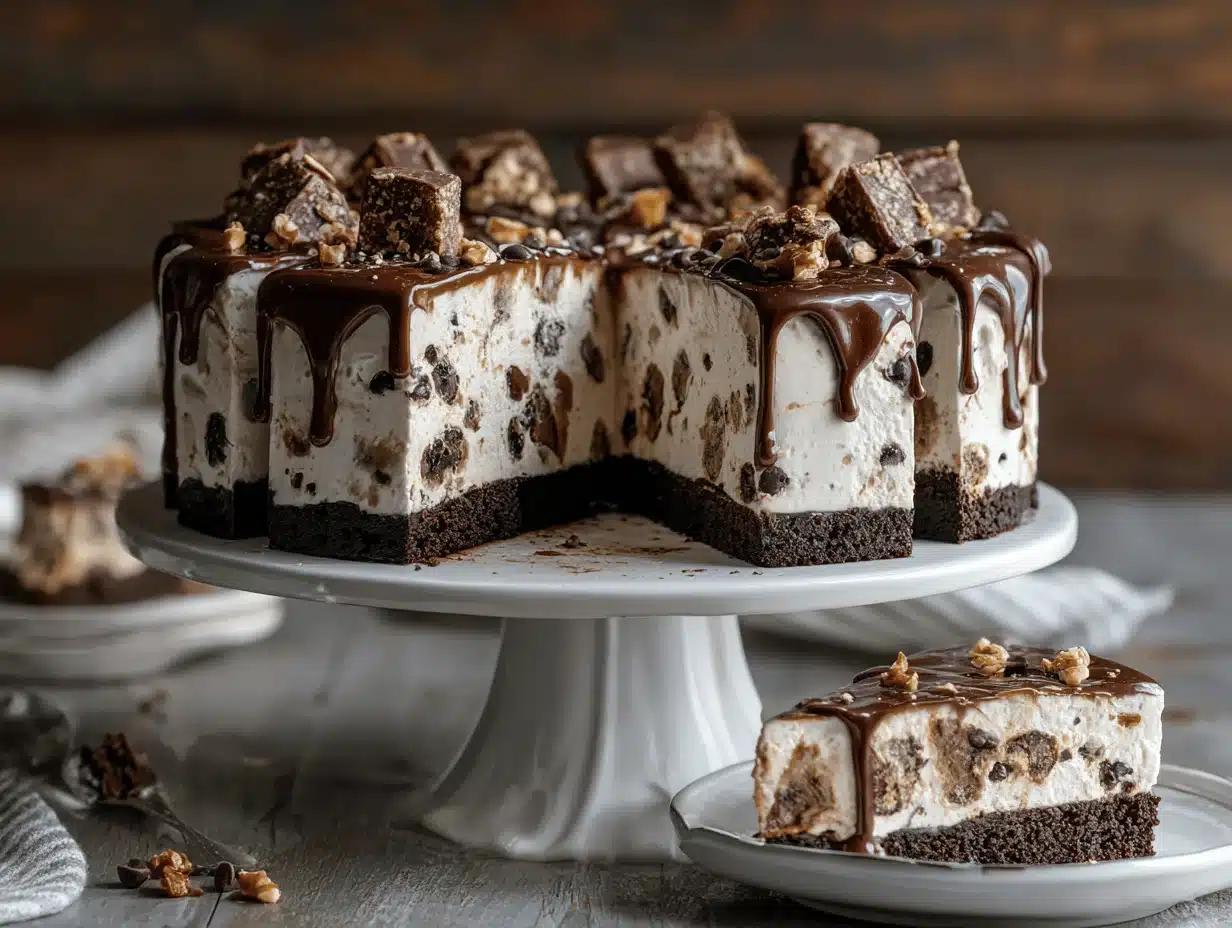
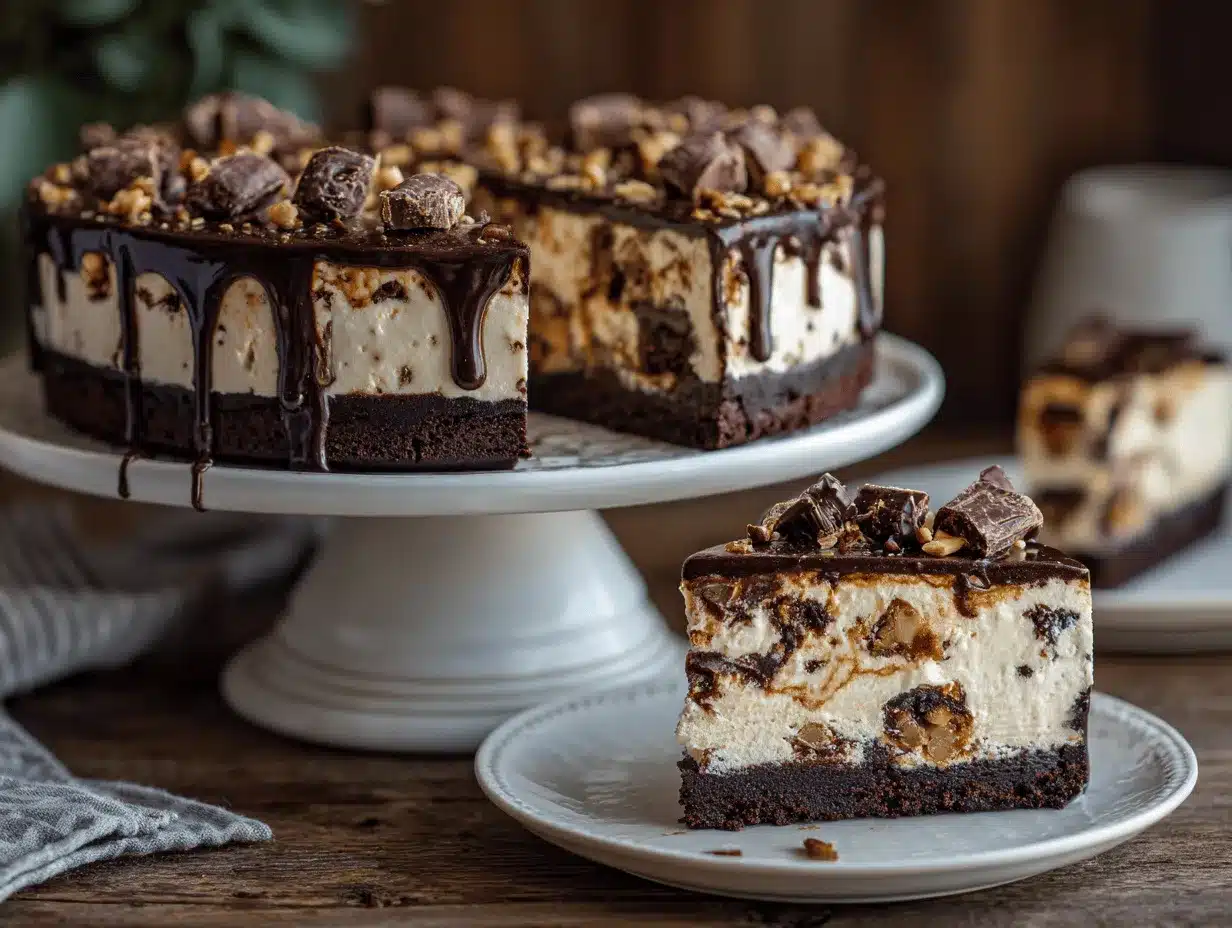
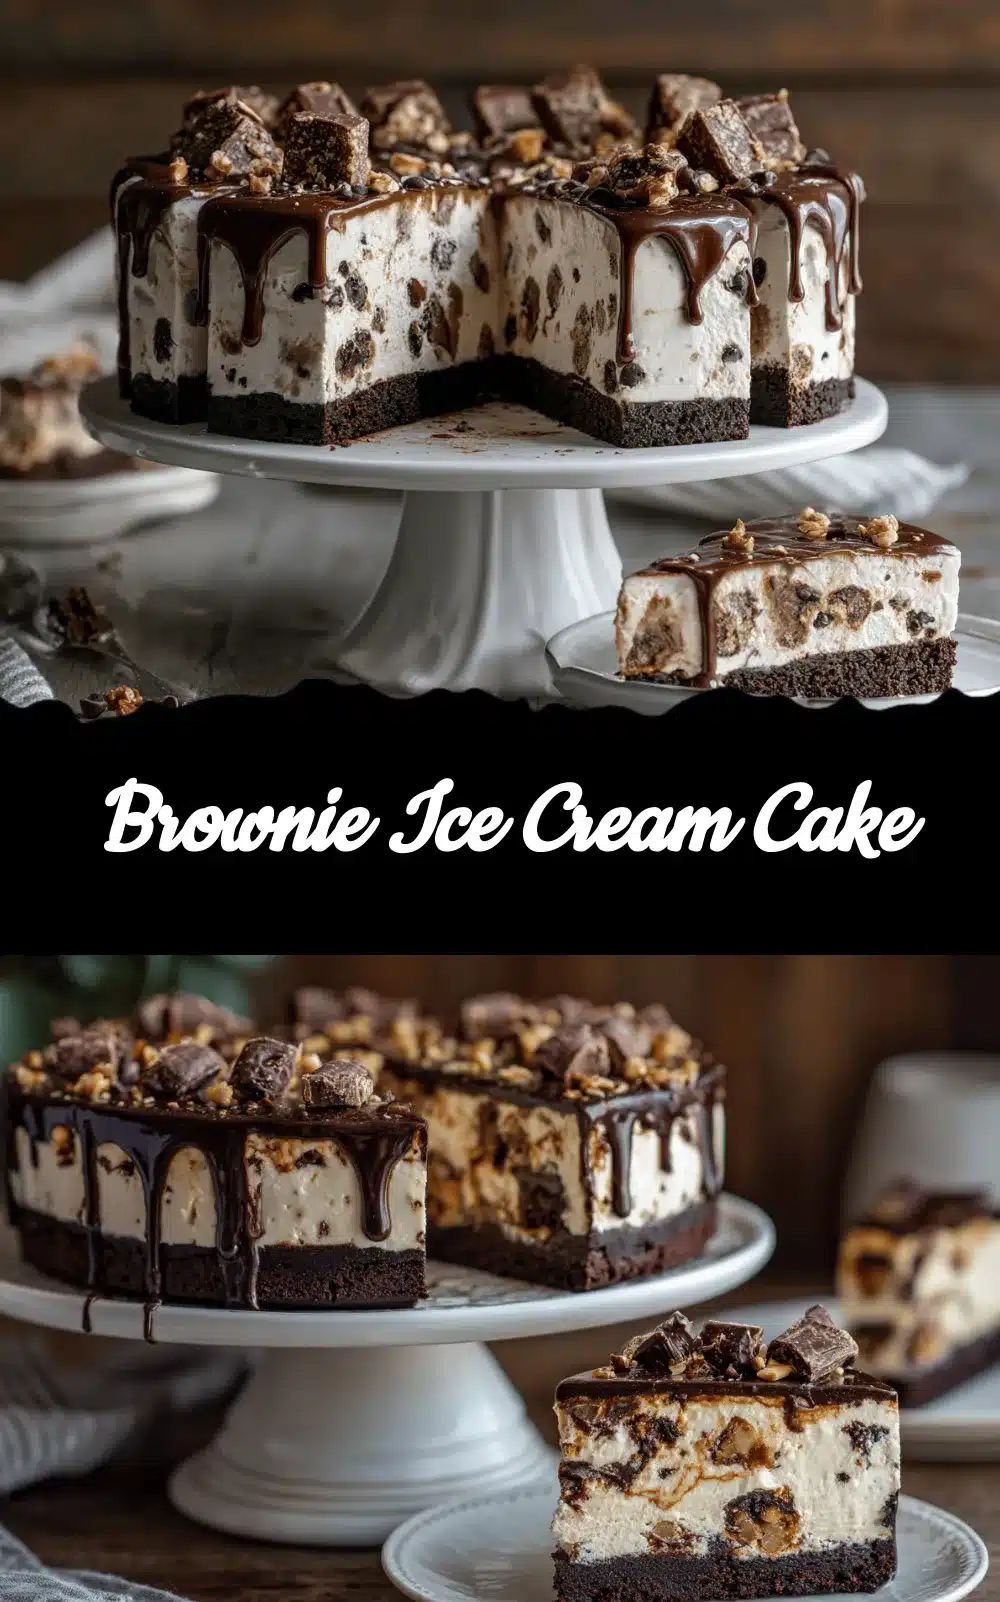
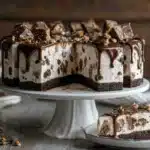
You know that moment when you slice into a dessert and everyone at the table goes silent for a second? That’s exactly what happens every time I make this Brownie Ice Cream Cake with a glossy Chocolate Ganache Drip. The first time I pulled this out for a summer birthday, the oohs and aahs were downright theatrical. Layers of fudgy brownie, creamy ice cream, and a silky chocolate ganache—honestly, it feels a little like cheating at dessert. The textures and flavors are pure magic, and you don’t need to be a baking pro to pull this off.
I first stumbled on the idea for this brownie ice cream cake after a long, hot July afternoon when my regular brownies just felt too heavy. My freezer was loaded with vanilla and chocolate ice cream, so I thought, “Why not combine them?” Fast forward to today, and this recipe is my go-to for potlucks, birthday parties, or just those “treat yourself” days. If you’re tired of store-bought ice cream cakes that taste a little… meh, this homemade dream will change the game for you. With the addition of a rich chocolate ganache drip, it’s downright showstopping.
Whether you’re a busy parent, a college student with basic kitchen gear, or someone who just loves chocolate, this brownie ice cream cake has your name on it. It’s forgiving, customizable, and always delivers. I’ve tested it a dozen times, swapped out flavors, and even made it gluten-free without anyone noticing. So, grab your favorite ice cream and let’s make dessert memories together.
Why You’ll Love This Brownie Ice Cream Cake
- Quick & Easy: You don’t need to spend all day in the kitchen—this recipe is surprisingly simple and comes together in under an hour (plus chilling time).
- Simple Ingredients: Most of the ingredients are pantry staples, and you can pick your favorite ice cream flavors from your local store. No need for specialty baking aisles!
- Perfect for Celebrations: Birthdays, family gatherings, BBQs, or whenever you want to impress—this brownie ice cream cake fits right in.
- Crowd-Pleaser: Kids love it, adults love it, and honestly, there are never leftovers. Even picky eaters are won over by the fudgy brownie and creamy ice cream combo.
- Unbelievably Delicious: The mix of cold, creamy, and rich chocolate textures is next-level. The ganache drip brings it all together with that extra bit of wow.
This brownie ice cream cake recipe stands out because of the homemade brownie base—it’s dense and fudgy, not the dry kind you sometimes get with boxed mixes. The trick is to slightly underbake the brownie, so it stays soft and pairs perfectly with the ice cream. And the chocolate ganache drip? It’s a glossy, melt-in-your-mouth finish that makes your cake look bakery-worthy (with zero stress). I’ve learned after a few trials that using high-quality chocolate and full-fat ice cream makes all the difference.
Honestly, this dessert is more than just a treat—it’s about bringing people together. There’s something about sharing a frozen slice on a hot day or cozying up with a piece during movie night that just feels right. If you want a make-ahead dessert that never fails, this is it.
Ingredients Needed for Brownie Ice Cream Cake
This recipe uses straightforward ingredients to build layers of flavor and texture. It’s flexible, too, so you can adapt the flavors to your liking or to what’s in your pantry. Here’s what you’ll need:
- For the Brownie Base:
- 1/2 cup (115g) unsalted butter, melted (adds richness and fudginess)
- 1 cup (200g) granulated sugar
- 2 large eggs, room temperature
- 1 tsp pure vanilla extract (I love using Nielsen-Massey for best flavor)
- 1/3 cup (40g) unsweetened cocoa powder (Dutch process for deeper chocolate flavor, but any will do)
- 1/2 cup (65g) all-purpose flour (swap for 1:1 gluten-free blend if needed)
- 1/4 tsp salt
- For the Ice Cream Layer:
- 1.5 quarts (about 1.4 liters) ice cream, softened (vanilla, chocolate, or your favorite flavor—Häagen-Dazs or Ben & Jerry’s hold up great)
- Optional: 1/2 cup (50g) mini chocolate chips or crushed cookies for extra texture
- For the Chocolate Ganache Drip:
- 3/4 cup (130g) semi-sweet chocolate chips or chopped chocolate (Ghirardelli is my go-to)
- 1/2 cup (120ml) heavy cream
- Pinch of salt (brings out the chocolate flavor)
- For Garnish (Optional):
- Fresh berries
- Chopped nuts (pecans or walnuts add crunch)
- Sprinkles or shaved chocolate
Ingredient Notes & Substitutions: If you prefer a dairy-free version, use vegan butter and coconut milk ice cream. Almond or oat flour can be swapped in for a slightly different texture. If you want to mix up the ice cream layer, try coffee, strawberry, or even mint chip for a fun twist. Honestly, the cake is so forgiving—almost any favorite ice cream works.
Equipment Needed
One of the things I love about this brownie ice cream cake is that you don’t need fancy gadgets. Here’s what you’ll want on hand:
- 9-inch (23cm) springform pan (makes layering and unmolding a breeze; you can use a regular cake pan lined with parchment, but the springform is truly handy)
- Mixing bowls (one large for brownie batter, one medium for ganache)
- Whisk and rubber spatula (I swear by my OXO spatula for scraping every last bit)
- Measuring cups and spoons
- Small saucepan (for heating cream for the ganache)
- Offset spatula or the back of a spoon (for smoothing ice cream and ganache)
- Plastic wrap or foil (for covering the cake in the freezer)
- Sharp knife (for clean slices—run under hot water between cuts for best results)
If you don’t have a springform pan, you can use a 9-inch square pan lined with parchment overhanging the sides for easy lifting. I’ve even tried this in a glass baking dish—just be sure to line it for easy removal. For budget-friendly options, most dollar stores carry decent mixing bowls and spatulas that last ages.
How to Make Brownie Ice Cream Cake with Chocolate Ganache Drip
-
Prepare the Brownie Base:
Preheat your oven to 350°F (175°C). Grease a 9-inch (23cm) springform pan and line the bottom with parchment paper. If you’re using a regular pan, make sure to leave some overhang for easy removal. In a large mixing bowl, whisk together 1/2 cup (115g) melted butter and 1 cup (200g) granulated sugar until glossy and combined (about 1 minute). Add 2 eggs and 1 tsp vanilla extract, whisking until smooth and pale. Sift in 1/3 cup (40g) cocoa powder, 1/2 cup (65g) flour, and 1/4 tsp salt. Fold gently with a spatula until just combined—don’t overmix, or your brownie will be tough.
-
Bake the Brownie:
Spread the batter evenly in the prepared pan. Bake for 18-22 minutes, until the edges are set and a toothpick comes out with a few moist crumbs. (Don’t wait for it to come out clean—you want a fudgy center, not a dry one.) Let the brownie cool completely in the pan. If you’re in a hurry, pop it in the fridge for 20-30 minutes.
-
Add the Ice Cream Layer:
Take your ice cream out of the freezer to soften for about 10-15 minutes. Once spreadable but not melted, gently scoop and dollop the ice cream over the cooled brownie layer. Use an offset spatula or the back of a spoon to smooth it into an even layer. If you’re adding chocolate chips or cookie crumbs, sprinkle them between scoops as you go. Cover the cake tightly with plastic wrap or foil and freeze for at least 4 hours, or until solid. (Overnight is best if you have time.)
-
Make the Chocolate Ganache Drip:
Once the cake is frozen, make the ganache. Place 3/4 cup (130g) chocolate chips or chopped chocolate in a medium bowl. In a small saucepan, heat 1/2 cup (120ml) heavy cream until just simmering (don’t let it boil!). Pour the hot cream over the chocolate and let sit for 2 minutes. Add a pinch of salt, then whisk until smooth and glossy. If it’s too thick, add a splash more warm cream; too thin, let it cool for a few minutes to thicken.
-
Unmold and Decorate:
Remove the cake from the freezer and run a warm knife around the edge. Release the springform pan. Set the cake on a serving plate. Pour the ganache over the center of the cake and gently coax it toward the edges to let it drip down naturally. If you want dramatic drips, use the back of a spoon to nudge some ganache over the edge. Garnish with berries, nuts, or sprinkles as desired.
-
Serve:
Let the cake sit at room temperature for 5-10 minutes before slicing. Use a sharp knife dipped in hot water for clean slices. Return any leftovers to the freezer promptly.
Troubleshooting: If the brownie sticks, try running a thin knife around the edge before unlatching the pan. If the ice cream is too hard to slice, let it sit a few more minutes. For a super-smooth ganache, always use high-quality chocolate and make sure your cream is hot (not boiling). My personal tip: work quickly with the ice cream layer so it doesn’t melt too much while spreading.
Pro Cooking Tips & Techniques
- Chill Between Layers: Don’t rush the freezing steps. Each layer needs to be firm before adding the next—otherwise, you’ll end up with a wobbly cake or melted ice cream puddles.
- Don’t Overbake the Brownie: Slightly underbaking is key for that fudgy texture. I’ve learned (the hard way) that even 3 extra minutes can make the base dry.
- Soften Ice Cream Just Enough: If the ice cream is too melty, it’ll seep into the brownie and make it soggy. Too frozen, and it’s impossible to spread. Aim for soft but still holding shape—like thick custard.
- Ganache Consistency: If your ganache is too thin, let it cool for a few minutes before pouring. If it’s too thick, microwave it in 5-second bursts or add a splash of cream.
- Clean Slices Every Time: Dip your knife in hot water and wipe clean between each slice. It’s a little extra work but makes for beautiful, Pinterest-worthy pieces!
If you’re multitasking, I suggest baking the brownie in the morning, adding the ice cream layer at lunchtime, and finishing with ganache just before serving. Mistakes happen—my first try, I poured ganache on a slightly melty cake, and whoops, it slid right off! Lesson learned: patience is your friend with this one.
Variations & Adaptations
This brownie ice cream cake recipe is a blank canvas for your creativity. Here are some fun ideas to make it your own:
- Dietary Swaps: Use gluten-free flour for the brownie, and dairy-free ice cream and chocolate for a vegan version. My friend’s son can’t have nuts, so I always skip nuts and use allergy-friendly chocolate chips for him.
- Seasonal Flavors: In summer, try strawberry or mango ice cream with a white chocolate ganache. For winter, peppermint ice cream and crushed candy canes are a hit!
- Flavor Combos: Mix and match ice cream flavors—chocolate and peanut butter, cookies and cream, or even rocky road. Swirl in caramel or fudge sauce between layers for an extra surprise.
- Different Bases: Not in the mood for brownies? Try a chocolate cookie crust or even blondies as the base for a change of pace.
- Cooking Methods: No oven? Use store-bought brownies or a no-bake cookie crust. For a mini version, layer everything in individual mason jars for easy serving!
My personal favorite variation? A layer of salted caramel ice cream in the center with a sprinkle of sea salt on the ganache. It’s a sweet-salty combo that gets rave reviews every time.
Serving & Storage Suggestions
Serve your brownie ice cream cake straight from the freezer for the cleanest slices. Let it sit on the counter for 5-10 minutes if it’s really solid—that way, it’s easier to cut. It looks gorgeous on a cake stand, especially with a glossy ganache drip and a handful of berries or sprinkles on top.
This cake pairs perfectly with coffee, iced lattes, or even a cold glass of milk. For a party, serve it alongside fresh fruit or a big bowl of whipped cream. If you like things extra chocolatey, drizzle some warm fudge sauce over each slice. To store, wrap the cake tightly in plastic wrap or foil and keep it in the freezer. It stays fresh for up to 2 weeks, though honestly, it never lasts that long at my house. To reheat slices slightly (if you want a softer bite), let them sit at room temp for 10-15 minutes—just don’t leave the whole cake out too long, or the ice cream will melt.
One thing I’ve noticed: the flavors meld and deepen after a day or two in the freezer, so leftovers are a real treat!
Nutritional Information & Benefits
This brownie ice cream cake is a treat, but it does have a few redeeming qualities! Each slice (assuming 12 per cake) has about 350-400 calories, with 6g protein and 2g fiber, depending on your ice cream and brownie mix-ins. If you opt for low-sugar ice cream or add in chopped nuts, you’ll boost the nutrition a bit.
Cocoa powder and dark chocolate are both rich in antioxidants, and nuts add healthy fats. If you’re gluten-free or dairy-free, the recipe is easily adaptable. Allergens to watch for: dairy, eggs, gluten, and nuts (if you use them in the garnish). Personally, I love that you can sneak in some nutrition by choosing better-for-you ice creams, or even adding a layer of frozen yogurt for a tangy twist.
Conclusion
If you’ve been searching for a dessert that’s easy, impressive, and downright delicious, this brownie ice cream cake recipe is your answer. It’s a crowd-pleaser that looks as good as it tastes, and you can truly make it your own with different flavors and toppings. I love this recipe because it always brings smiles—whether we’re celebrating something big or just enjoying a quiet Saturday night.
Don’t be afraid to experiment with your favorite ice cream combinations or add a fun garnish on top. If you try this recipe, let me know in the comments how it turned out or share your own twist. Snap a picture and tag me—I love seeing your creations! Honestly, I hope this cake brings as much joy to your table as it has to mine.
Frequently Asked Questions
Can I make this brownie ice cream cake in advance?
Absolutely! In fact, making it a day ahead gives the layers time to set and the flavors to meld. Just keep it wrapped in the freezer until you’re ready to serve.
What’s the best way to slice the cake cleanly?
Use a sharp knife dipped in hot water and wiped dry between each cut. This helps glide through the ice cream and ganache for perfect slices.
Can I use store-bought brownies instead of homemade?
Yes, you can! Just make sure they’re fudgy and not too thick—about 1 inch (2.5cm) high is perfect. Store-bought shortcuts work in a pinch.
How do I prevent the ice cream layer from melting while assembling?
Work quickly when spreading the ice cream, and if needed, pop the pan back in the freezer between steps. Soften the ice cream just enough to spread, but not so much that it’s runny.
Can I use different flavors of ice cream in the same cake?
Definitely! Swirl or layer two or three flavors for a fun, colorful effect. Just make sure each layer is slightly frozen before adding the next to keep them distinct.
Pin This Recipe!
Brownie Ice Cream Cake with Chocolate Ganache
- Total Time: 5 hours (includes freezing time)
- Yield: 12 servings 1x
Description
This easy homemade Brownie Ice Cream Cake features a fudgy brownie base, creamy ice cream center, and a glossy chocolate ganache drip. It’s a showstopping dessert that’s perfect for birthdays, celebrations, or any time you want to impress with minimal effort.
Ingredients
- 1/2 cup (115g) unsalted butter, melted
- 1 cup (200g) granulated sugar
- 2 large eggs, room temperature
- 1 tsp pure vanilla extract
- 1/3 cup (40g) unsweetened cocoa powder
- 1/2 cup (65g) all-purpose flour
- 1/4 tsp salt
- 1.5 quarts (about 1.4 liters) ice cream, softened (vanilla, chocolate, or your favorite flavor)
- Optional: 1/2 cup (50g) mini chocolate chips or crushed cookies
- 3/4 cup (130g) semi-sweet chocolate chips or chopped chocolate
- 1/2 cup (120ml) heavy cream
- Pinch of salt
- Optional garnish: Fresh berries
- Optional garnish: Chopped nuts (pecans or walnuts)
- Optional garnish: Sprinkles or shaved chocolate
Instructions
- Preheat oven to 350°F (175°C). Grease a 9-inch springform pan and line the bottom with parchment paper.
- In a large mixing bowl, whisk together melted butter and granulated sugar until glossy and combined. Add eggs and vanilla extract, whisking until smooth and pale.
- Sift in cocoa powder, flour, and salt. Fold gently with a spatula until just combined—do not overmix.
- Spread the batter evenly in the prepared pan. Bake for 18-22 minutes, until edges are set and a toothpick comes out with a few moist crumbs. Let the brownie cool completely in the pan.
- Let ice cream soften at room temperature for 10-15 minutes. Scoop and dollop ice cream over the cooled brownie layer. Smooth into an even layer with an offset spatula or spoon. Sprinkle in chocolate chips or cookie crumbs if using. Cover tightly and freeze for at least 4 hours, or overnight.
- For the ganache, place chocolate chips or chopped chocolate in a medium bowl. Heat heavy cream in a small saucepan until just simmering. Pour hot cream over chocolate and let sit for 2 minutes. Add a pinch of salt, then whisk until smooth and glossy.
- Remove cake from freezer and run a warm knife around the edge. Release the springform pan and set cake on a serving plate.
- Pour ganache over the center of the cake and gently coax it toward the edges to let it drip down. Garnish with berries, nuts, or sprinkles as desired.
- Let the cake sit at room temperature for 5-10 minutes before slicing. Use a sharp knife dipped in hot water for clean slices. Return leftovers to the freezer promptly.
Notes
For best results, slightly underbake the brownie for a fudgy texture. Use high-quality chocolate and full-fat ice cream for the richest flavor. Freeze each layer until firm before adding the next. To make gluten-free, use a 1:1 gluten-free flour blend. For dairy-free, use vegan butter and coconut milk ice cream. Let the cake sit at room temperature for a few minutes before slicing for easier serving.
- Prep Time: 25 minutes
- Cook Time: 22 minutes
- Category: Dessert
- Cuisine: American
Nutrition
- Serving Size: 1 slice (1/12 of cake)
- Calories: 375
- Sugar: 32
- Sodium: 120
- Fat: 20
- Saturated Fat: 12
- Carbohydrates: 45
- Fiber: 2
- Protein: 6
Keywords: brownie ice cream cake, chocolate ganache, homemade ice cream cake, birthday dessert, summer dessert, easy cake, frozen dessert, gluten-free option, make-ahead dessert