Introduction
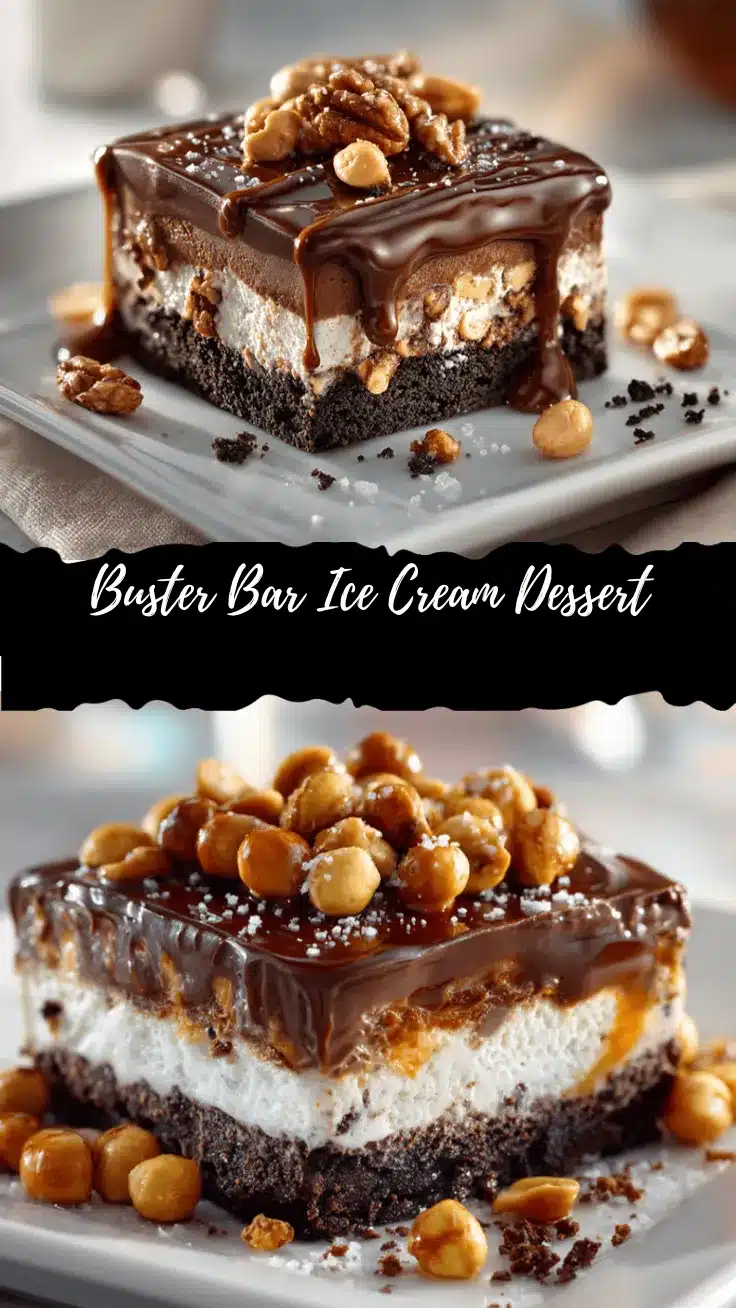
The first time I bit into a Buster Bar ice cream dessert, the world just stopped for a second. You know that rich, chocolatey shell giving way to cool, velvety ice cream and salty peanuts? It’s pure nostalgia, like summer nights after little league games and family get-togethers in the backyard. This irresistible Buster Bar ice cream dessert isn’t just a treat—it’s a memory-maker. And honestly, it’s dangerously easy to put together at home.
I stumbled onto making my own Buster Bar ice cream dessert years ago, after a Dairy Queen run got rained out. My kids were devastated, and I was determined to whip up something even better. After a few tweaks (and a couple of melty mishaps), I finally landed on a version that’s not only a dead ringer for the original, but somehow, even more decadent. It’s become our go-to for birthdays, BBQs, and—let’s face it—just about any time the sweet tooth strikes.
What I love about this recipe is how it turns a handful of simple ingredients into something totally magical. You don’t need fancy equipment or a culinary degree, just a little patience and a craving for something cold, creamy, and completely over the top. This Buster Bar ice cream dessert is perfect for busy parents, dessert lovers, or anyone looking to impress without breaking a sweat. Trust me, after making it a dozen times (and counting), I can say it’s one of those recipes that never disappoints. Let’s get into the delicious details!
Why You’ll Love This Recipe
I’ve tested a lot of frozen desserts, but this Buster Bar ice cream dessert stands out every single time. There’s something about the combination of creamy vanilla ice cream, crunchy cookies, salty peanuts, and a luscious homemade fudge topping that just works. Here’s why you’ll want this recipe in your back pocket:
- Quick & Easy: Pulls together in about 30 minutes (plus freezing time). No ice cream machine, no complicated steps—just layers of goodness.
- Simple Ingredients: Everything you need can be found at your local grocery store. Most of it you probably have on hand already.
- Perfect for Parties: This dessert is a total showstopper at potlucks, birthdays, or casual summer hangouts. It feeds a crowd and always gets a “wow.”
- Crowd-Pleaser: Adults love the nostalgia, kids love the ice cream and chocolate. It’s one of those rare desserts everyone fights for the last piece!
- Unbelievably Delicious: The salty-sweet combo, with that thick fudge topping and a surprise crunch, makes every bite a treat.
What makes this Buster Bar ice cream dessert different from all the rest? I blend real, creamy vanilla ice cream with a buttery cookie base and go heavy on the peanuts for that classic salty snap. My fudge topping is homemade (not from a jar), thick and glossy, and sets up with the perfect chew. I even tweak the cookie crust for extra crunch, thanks to a tip from my aunt who insists on doubling the chocolate sandwich cookies. It’s little details like this that make this recipe the one you’ll come back to, again and again.
Honestly, it’s not just a dessert—it’s the kind of treat that makes people pause and really savor. There’s comfort in every bite, but it still feels special enough for a celebration. Whether you’re making it for a birthday bash or just a Tuesday night, this Buster Bar ice cream dessert is pure happiness in a pan.
What Ingredients You Will Need
This Buster Bar ice cream dessert recipe uses familiar, easy-to-find ingredients to build layers of flavor and texture. I love that you can swap in what you have, but these basics are what give it that classic flavor:
- For the Cookie Crust:
- Chocolate sandwich cookies (like Oreos), finely crushed (about 36 cookies or 3 cups/300g) – the classic base, delivers a deep chocolate crunch.
- Unsalted butter, melted (1/2 cup/115g) – helps the crust hold together and adds richness.
- For the Ice Cream Layer:
- Vanilla ice cream, slightly softened (1.5 quarts/1.4 liters) – go for full-fat for the creamiest texture. I use Tillamook or Häagen-Dazs, but any creamy brand works.
- For the Peanut Layer:
- Salted roasted peanuts (1.5 cups/180g) – the salty crunch is essential! You can use dry-roasted for an extra punch.
- For the Fudge Sauce:
- Granulated sugar (1 cup/200g)
- Evaporated milk (2/3 cup/160ml) – don’t swap for sweetened condensed, it’ll be too thick.
- Semisweet chocolate chips (1/2 cup/90g) – gives a rich, chocolate flavor.
- Unsalted butter (1/2 cup/115g)
- Vanilla extract (1 teaspoon/5ml)
- Salt (just a pinch)
Ingredient Tips and Swaps:
- If you’re gluten-free, swap the sandwich cookies for a GF variety. Works just as well.
- Lactose intolerant? Use your favorite non-dairy ice cream (like coconut or oat-based) and vegan butter. The fudge topping can be made with coconut milk if needed.
- Not a peanut fan? Try toasted almonds or cashews. Sunflower seeds work for a nut-free version—my neighbor’s son loves it that way!
- Want to mix things up? Add a layer of caramel sauce between the peanuts and the fudge for extra decadence.
Most of these ingredients are pantry staples, and you can always tweak based on what’s in your kitchen. The real trick is to let the ice cream soften just enough for easy spreading, but not so much that it melts everywhere. Trust me, a little patience goes a long way here!
Equipment Needed
You don’t need any fancy gadgets to make this Buster Bar ice cream dessert. Here’s what I use every single time (and a few swaps if you’re missing something):
- 9×13-inch (23x33cm) baking pan or glass dish: The classic size for perfect layers. I’ve used both metal and glass; glass lets you peek at the pretty layers.
- Food processor or zip-top bag and rolling pin: For crushing cookies. If you don’t have a food processor, just toss the cookies in a sturdy bag and smash away—kids love this job!
- Mixing bowls: At least one medium and one large for mixing crust and fudge sauce.
- Microwave or stovetop: For melting butter and making the fudge sauce.
- Rubber spatula or offset spatula: For spreading ice cream and fudge in smooth, even layers.
- Measuring cups and spoons: Accuracy helps, especially for the fudge.
- Plastic wrap or foil: For covering the dessert while freezing.
If you’re short on pans, line your dish with parchment so you can lift the whole dessert out for easy slicing. And whatever you do, don’t skip on the spatula—trust me, trying to spread ice cream with a spoon is more trouble than it’s worth. For budget-friendly gear, I often grab basic pans and bowls from discount stores. They last forever if you hand-wash and dry them right away.
Preparation Method
Ready for the best part? Here’s how to build your irresistible Buster Bar ice cream dessert, step by step (with plenty of personal tips tossed in):
- Make the Cookie Crust (10 minutes):
- Crush 36 chocolate sandwich cookies (about 3 cups/300g) in a food processor until fine. No processor? Pop them in a zip-top bag and smash with a rolling pin.
- Combine cookie crumbs with 1/2 cup (115g) melted unsalted butter in a bowl. Stir until all crumbs are moistened.
- Press the mixture firmly into the bottom of a 9×13-inch (23x33cm) pan. Use the bottom of a measuring cup for an even layer. Tip: Don’t leave gaps or the ice cream will sneak through later!
- Pop the crust in the freezer for 10 minutes to set.
- Layer the Ice Cream (10 minutes):
- Let 1.5 quarts (1.4L) vanilla ice cream sit at room temp for 10–15 minutes. It should be soft but not melted—think spreadable, like soft-serve.
- Scoop the softened ice cream onto the chilled crust. Use a rubber spatula to spread it into an even layer. If it gets sticky, dip your spatula in hot water.
- Return the pan to the freezer for 20–30 minutes, until firm.
- Add the Peanuts (2 minutes):
- Sprinkle 1.5 cups (180g) salted roasted peanuts evenly over the ice cream layer. Gently press down with clean hands so they stick. My kids call this the “crunchy confetti” step!
- Prepare the Fudge Sauce (10 minutes):
- In a medium saucepan, combine 1 cup (200g) sugar, 2/3 cup (160ml) evaporated milk, 1/2 cup (90g) semisweet chocolate chips, and 1/2 cup (115g) unsalted butter.
- Cook over medium heat, stirring constantly, until the mixture comes to a gentle boil. Let it bubble for 7–8 minutes, stirring often, until thickened and glossy (it’ll coat the back of a spoon).
- Remove from heat, stir in 1 teaspoon (5ml) vanilla extract and a pinch of salt. Let the sauce cool for 15–20 minutes, until just warm (not hot, or it’ll melt the ice cream!).
- Top and Freeze (5 minutes active, 2–4 hours freezing):
- Pour the cooled fudge sauce evenly over the peanut layer. Use a spatula to nudge it into the corners.
- Cover the pan tightly with plastic wrap or foil.
- Freeze for at least 2–4 hours, or until completely firm. Overnight is best for the cleanest slices.
- Serve:
- Let the Buster Bar ice cream dessert sit at room temp for 5–10 minutes before cutting into bars. Dip your knife in hot water for clean cuts.
- Serve right away and watch everyone’s faces light up!
Troubleshooting: If the fudge sauce is too runny, simmer it a bit longer. If slicing is tough, let the pan sit out for a few extra minutes. And if your layers get messy—hey, it still tastes amazing. I’ve never had anyone complain!
Cooking Tips & Techniques
After making this dessert more times than I can count, here are my best tips for nailing it every time (and a few mistakes I’ve learned from the hard way):
- Don’t Over-Soften the Ice Cream: Letting it melt too much makes the layers runny and hard to cut. Aim for soft-serve consistency (not puddle status).
- Chill Between Layers: Freezing after each step keeps the layers sharp and the dessert sturdy. If you rush, the fudge can sink right through the ice cream—ask me how I know.
- Use Real Butter: Margarine just doesn’t give the crust the same snap or flavor.
- Let the Fudge Cool: Pouring hot fudge over the ice cream will create a melty mess. Wait until it’s just warm to the touch.
- Cut with a Hot Knife: For clean, Pinterest-worthy squares, dip your knife in hot water and wipe between cuts.
- Get Creative with Add-Ins: Swirl in caramel or add crushed toffee bits for a twist. I once did a layer of mini marshmallows—huge hit with the kids!
- Make Ahead: This dessert can be made up to two days in advance. The flavors meld and the fudge sets up even better overnight.
- Consistency is Key: If you want every piece to look perfect, use a ruler to score your bars before slicing (I learned this trick from a catering gig).
My biggest mishap? Once, I tried to shortcut the freezing time and ended up with a pool of chocolate and ice cream soup. So, patience is your friend here. The payoff is absolutely worth it!
Variations & Adaptations
This Buster Bar ice cream dessert is super flexible. Here’s how you can switch things up based on your mood or what you have on hand:
- Dietary Swaps:
- Gluten-Free: Use gluten-free sandwich cookies for the base. The rest is naturally GF!
- Dairy-Free: Choose a creamy non-dairy ice cream (almond, coconut, or oat-based) and swap in vegan butter. Use coconut milk for the fudge sauce.
- Nut-Free: Replace peanuts with toasted pumpkin seeds, sunflower seeds, or skip them entirely for a smooth, classic bar.
- Flavor Variations:
- Mint Chocolate: Use mint chocolate chip ice cream and add a few drops of peppermint extract to the fudge sauce.
- Coffee Buzz: Swap in coffee ice cream and sprinkle in some chopped espresso beans over the peanuts.
- Caramel Crunch: Layer in caramel sauce above the peanuts for extra ooey-gooey goodness.
- Seasonal Twists:
- Summer: Add a layer of fresh strawberries or raspberries under the fudge for a fruity surprise.
- Holiday: Use peppermint ice cream and crushed candy canes on top for a festive flair.
One of my favorite spins? I once made a s’mores version with marshmallow ice cream and crumbled graham crackers. It was a campfire hit—no tent required! Don’t be afraid to experiment, the base recipe is super forgiving.
Serving & Storage Suggestions
This Buster Bar ice cream dessert is best served straight from the freezer, after a quick 5–10 minute rest at room temp. The layers slice beautifully and look stunning on a platter. For parties, I like to cut it into small squares so everyone can try a piece (or two).
Pair it with hot coffee, cold milk, or a drizzle of extra fudge sauce if you’re feeling wild. It also goes great with fresh berries or a dollop of whipped cream on the side for extra flair.
Leftovers? Cover tightly with plastic wrap or foil and store in the freezer for up to a week (if it lasts that long!). If you want to make it ahead, you can prep the whole thing up to two days prior to serving—just keep it well-covered to avoid freezer burn. To reheat (if you want a gooier bite), let a slice sit at room temp for 15 minutes—don’t microwave or the fudge will melt unevenly.
Honestly, the flavors get even better after a day or two as the fudge and peanuts meld into the ice cream. It’s the ultimate make-ahead treat for every occasion.
Nutritional Information & Benefits
Here’s a rough breakdown per serving (based on 16 bars):
- Calories: ~350
- Fat: 20g
- Sugar: 27g
- Protein: 6g (thanks to the peanuts!)
- Gluten-free and dairy-free options available
- Contains peanuts, dairy, and gluten (unless using substitutions)
The peanuts add heart-healthy fats and a little protein, while the ice cream and fudge sauce are all about indulgence. If you’re watching sugar, use a low-sugar ice cream and reduce the sugar in the fudge by a third—it still works. Personally, I love that you can control the ingredients and tweak for allergies or dietary needs. Treat yourself, but know you can make it fit your family’s wellness goals, too!
Conclusion
There’s just something magical about a homemade Buster Bar ice cream dessert. Maybe it’s the layers, the salty-sweet crunch, or that feeling of pulling a pan of something special from the freezer. This recipe has become a family tradition in my house, and I hope it brings as much joy to your table as it does to ours.
Don’t forget, you can make it your own—switch up the ice cream, play with the toppings, or go wild with extra fudge. The best recipes are the ones you tweak to fit your favorites.
If you try this Buster Bar ice cream dessert, I’d love to hear how it turns out! Drop a comment below, share a photo, or let me know your signature spin. Let’s keep the sweet memories (and the dessert bars) going!
Here’s to cold treats, big smiles, and desserts that bring us all together. Enjoy every last bite!
Frequently Asked Questions
How far in advance can I make the Buster Bar ice cream dessert?
You can make it up to two days ahead—just keep it tightly covered in the freezer. The flavors actually meld and improve overnight.
What’s the best way to cut clean slices?
Let the dessert sit at room temp for 5–10 minutes, then use a sharp knife dipped in hot water. Wipe the knife between cuts for perfect squares.
Can I use store-bought fudge sauce instead of homemade?
You can, but the homemade fudge really sets this recipe apart. Store-bought works in a pinch—just make sure it’s thick and not too runny.
Is there a nut-free alternative?
Absolutely! Swap the peanuts for sunflower or pumpkin seeds, or just skip them for a smooth, classic version.
What’s the best way to store leftovers?
Keep the bars tightly wrapped in the freezer. They’ll stay fresh for up to a week—if they last that long! Let sit at room temp for a few minutes before serving for the best texture.
Pin This Recipe!
Buster Bar Ice Cream Dessert
- Total Time: 2 hours 45 minutes (includes freezing time)
- Yield: 16 servings 1x
Description
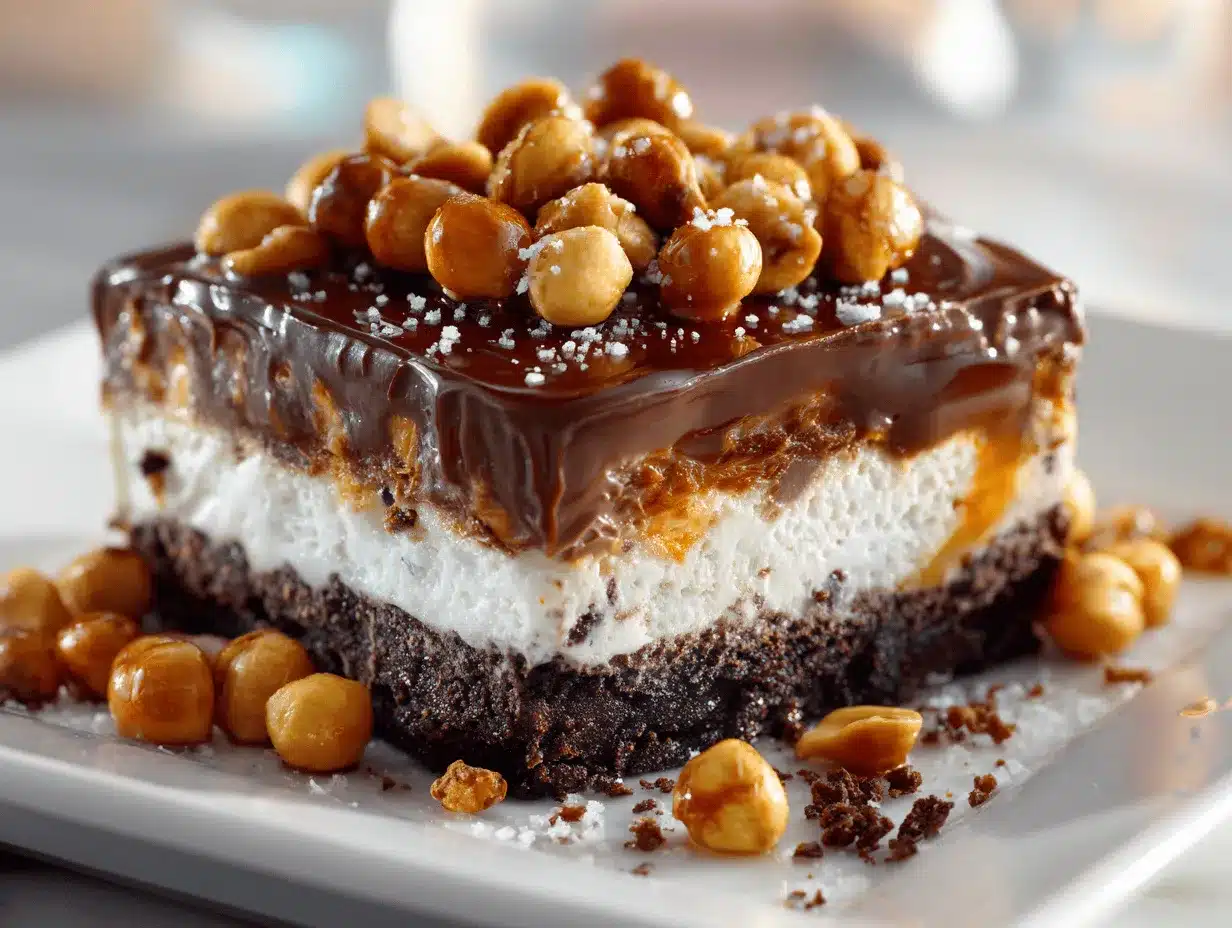
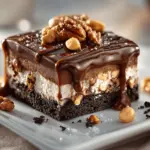
This easy homemade Buster Bar ice cream dessert layers a crunchy chocolate cookie crust, creamy vanilla ice cream, salty peanuts, and a thick, glossy fudge topping. It’s a nostalgic frozen treat perfect for parties, birthdays, or any time you crave a decadent, crowd-pleasing dessert.
Ingredients
- 36 chocolate sandwich cookies (like Oreos), finely crushed (about 3 cups)
- 1/2 cup unsalted butter, melted
- 1.5 quarts vanilla ice cream, slightly softened
- 1.5 cups salted roasted peanuts
- 1 cup granulated sugar
- 2/3 cup evaporated milk
- 1/2 cup semisweet chocolate chips
- 1/2 cup unsalted butter
- 1 teaspoon vanilla extract
- Pinch of salt
Instructions
- Crush 36 chocolate sandwich cookies in a food processor or in a zip-top bag with a rolling pin until fine.
- Combine cookie crumbs with 1/2 cup melted unsalted butter in a bowl. Stir until all crumbs are moistened.
- Press the mixture firmly into the bottom of a 9×13-inch pan. Freeze for 10 minutes to set.
- Let 1.5 quarts vanilla ice cream sit at room temperature for 10–15 minutes until spreadable but not melted.
- Spread the softened ice cream evenly over the chilled crust using a rubber spatula. Freeze for 20–30 minutes until firm.
- Sprinkle 1.5 cups salted roasted peanuts evenly over the ice cream layer and gently press down.
- In a medium saucepan, combine 1 cup sugar, 2/3 cup evaporated milk, 1/2 cup semisweet chocolate chips, and 1/2 cup unsalted butter.
- Cook over medium heat, stirring constantly, until the mixture comes to a gentle boil. Let it bubble for 7–8 minutes, stirring often, until thickened and glossy.
- Remove from heat, stir in 1 teaspoon vanilla extract and a pinch of salt. Let the sauce cool for 15–20 minutes until just warm.
- Pour the cooled fudge sauce evenly over the peanut layer and spread with a spatula.
- Cover the pan tightly with plastic wrap or foil and freeze for at least 2–4 hours, or until completely firm (overnight is best).
- Let the dessert sit at room temperature for 5–10 minutes before cutting into bars. Dip your knife in hot water for clean cuts. Serve immediately.
Notes
For clean layers, freeze between each step and let the fudge sauce cool before pouring over the ice cream. Use gluten-free cookies and non-dairy ice cream for dietary adaptations. Cut with a hot knife for neat bars. Dessert can be made up to two days ahead and stored tightly covered in the freezer.
- Prep Time: 25 minutes
- Cook Time: 10 minutes
- Category: Dessert
- Cuisine: American
Nutrition
- Serving Size: 1 bar (1/16 of pan)
- Calories: 350
- Sugar: 27
- Sodium: 180
- Fat: 20
- Saturated Fat: 10
- Carbohydrates: 36
- Fiber: 2
- Protein: 6
Keywords: buster bar, ice cream dessert, frozen treat, chocolate peanut dessert, homemade fudge, party dessert, summer dessert, no bake dessert